In today's article, we will explore how to perform an audit of access permissions for a SharePoint site.
This process is relatively easy when dealing with a limited number of sites using the end-user environment. However, if you have a large number of sites to manage, you will need automated procedures—specifically using PowerShell.
Method 1: Using the End-User Environment
From the user interface, you can check permissions by following these steps:
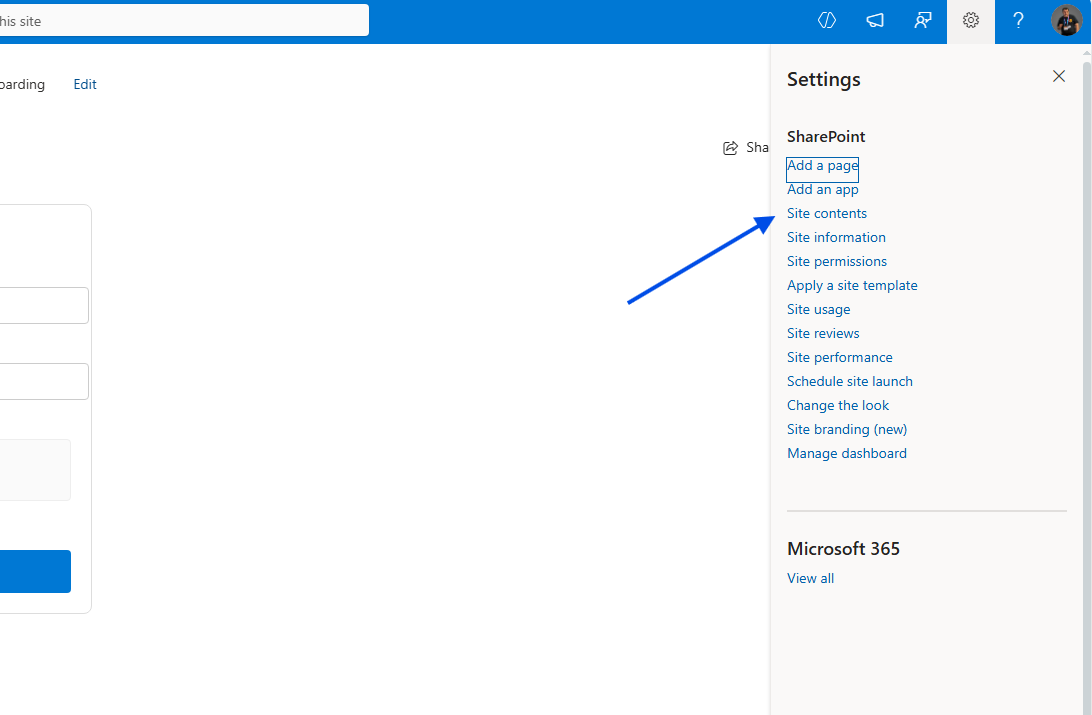
Navigate to Site Contents: Go to your desired site, click the gear icon in the top right, and select Site Contents.
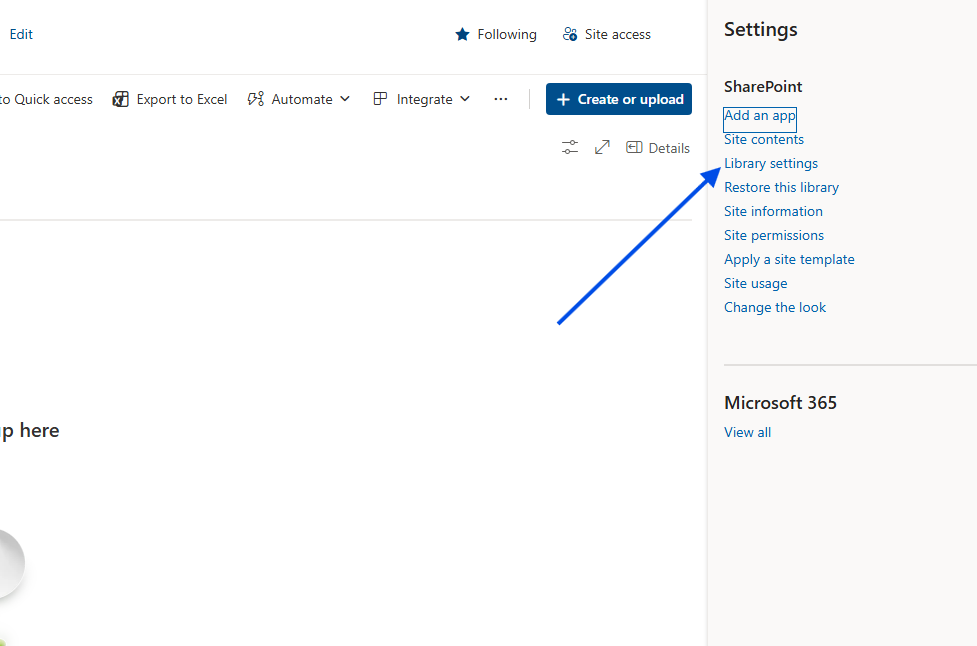
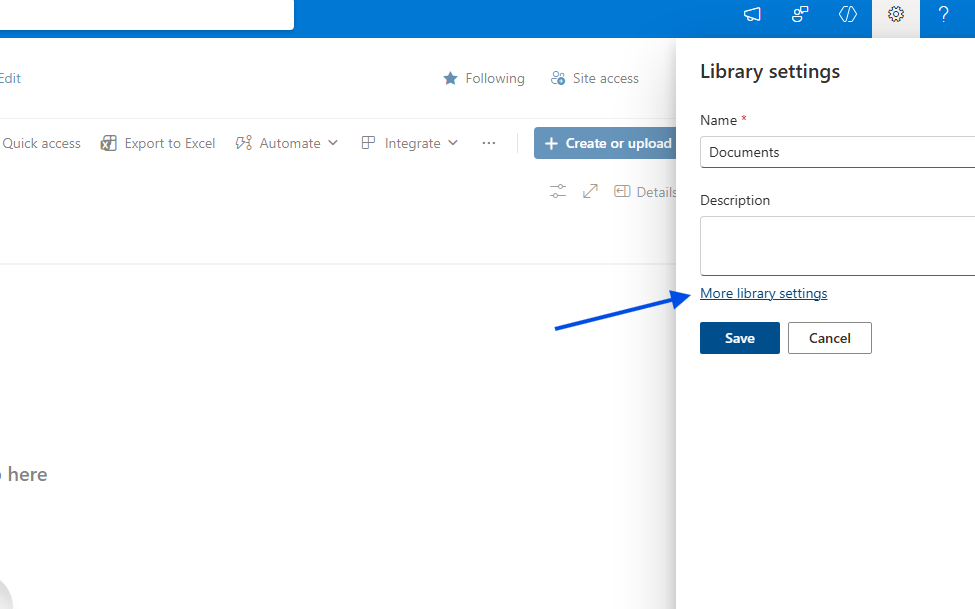
Access Library Settings: Choose the library you want to check, click the gear icon again, and select Library settings.
Note: The user must have Administrator rights to have a full overview of permission management for the site.
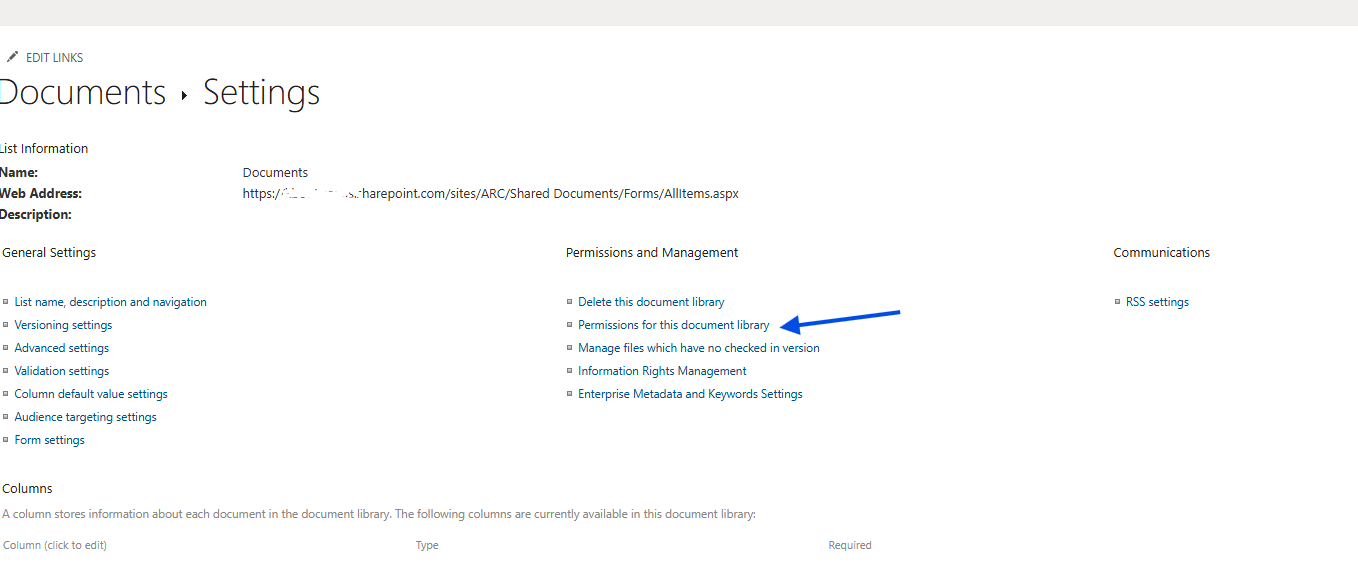
Advanced Settings: Select More library settings.
Permissions Page: Select Permissions for this document library.
As shown on the next page, you can see whether the library inherits permissions from its parent, the SharePoint groups, Active Directory groups, and individual users who have access, along with their specific permission levels. Crucially, the standard interface does not offer an "Export to Excel" option for this data. 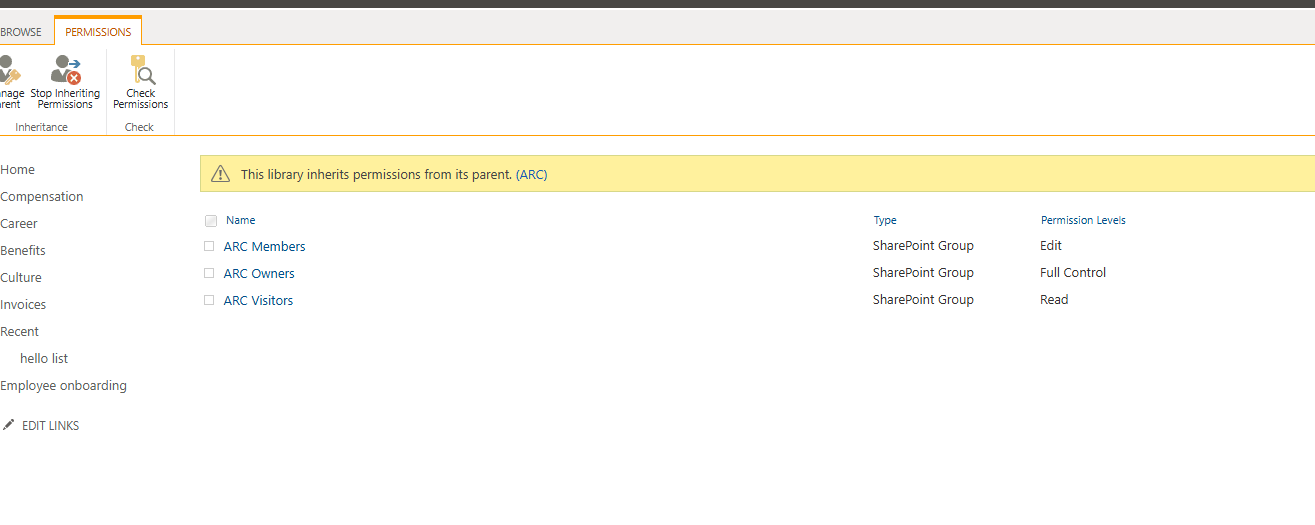
Method 2: Automation via PowerShell (PnP PowerShell)
To view all permissions and export them into an Excel-compatible format (CSV), you can execute the following PowerShell script. This script uses the PnP PowerShell module to generate a detailed report.
# --- Settings--- $siteUrl = "https://mytenant.sharepoint.com/sites/ARC" $libraryName = "Documents" # Το όνομα της βιβλιοθήκης $clinetId = "00000000-0000-0000-0000-00000000000"1. Connect SharePoint Online
Connect-PnPOnline -Url $siteUrl -Interactive -ClientId "00000000-0000-0000-0000-00000000000"
2. get library and Permissions
Χρησιμοποιούμε το -Includes για να φέρουμε τα RoleAssignments (δικαιώματα)
$library = Get-PnPList -Identity $libraryName -Includes RoleAssignments, HasUniqueRoleAssignments
Write-Host "`n--- Έλεγχος Δικαιωμάτων: $($library.Title) ---" -ForegroundColor Cyan Write-Host "Unique Permissions (Διακοπή κληρονομικότητας): $($library.HasUniqueRoleAssignments)" -ForegroundColor Yellow
3. Edit Permissions
$report = foreach ($roleAssignment in $library.RoleAssignments) { # Φόρτωση των ιδιοτήτων Member και RoleDefinitions Get-PnPProperty -ClientObject $roleAssignment -Property Member, RoleDefinitionBindings
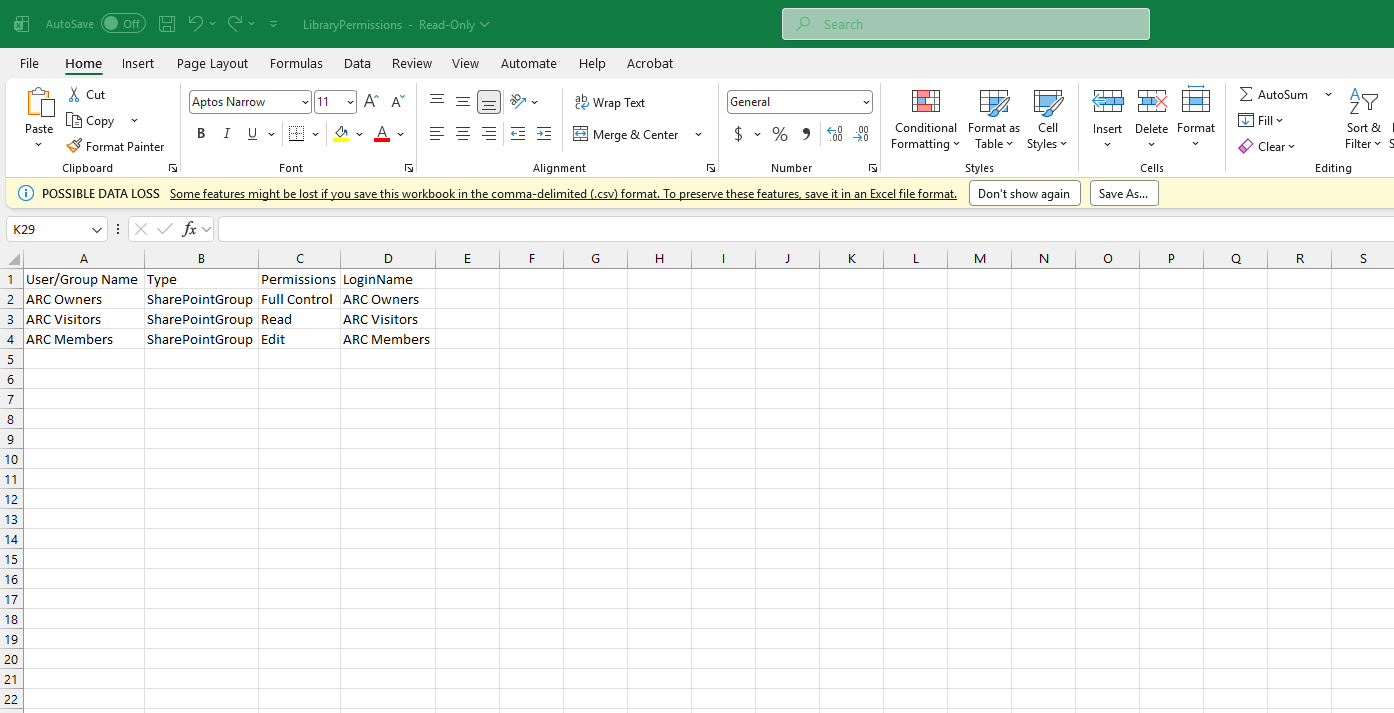
$member = $roleAssignment.Member $roles = $roleAssignment.RoleDefinitionBindings | Select-Object -ExpandProperty Name $roleNames = $roles -join ", " [PSCustomObject]@{ "User/Group Name" = $member.Title "Type" = $member.PrincipalType # Χρήστης, SharePoint Group ή Security Group "Permissions" = $roleNames "LoginName" = $member.LoginName }}
Preview in console
$report | Format-Table -AutoSize
4. Export CSV
$report | Export-Csv -Path "C:\LibraryPermissions.csv" -NoTypeInformation -Encoding UTF8
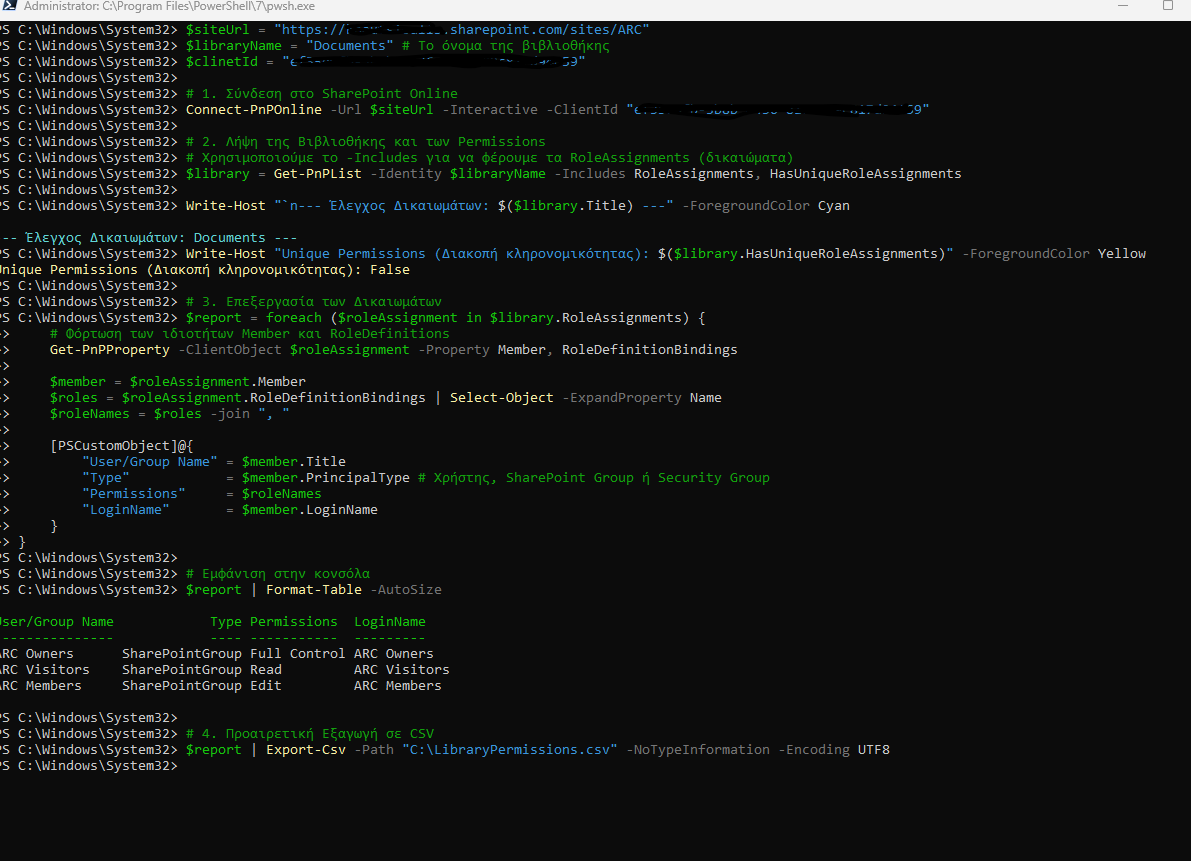
This script provides a clean overview of who has access and what they can do, which you can then open and filter in Excel.