In today's post, we will look at how to migrate a SharePoint list from an on-premises environment to SharePoint Online.
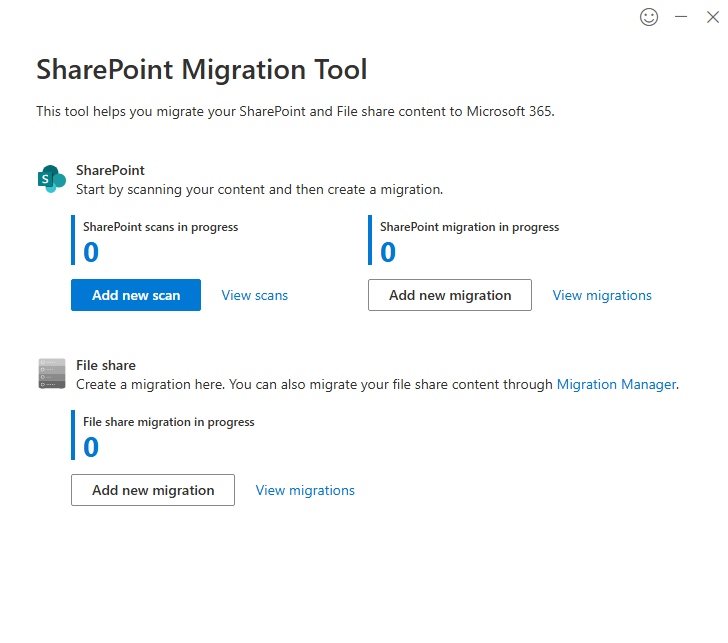
To perform this transition, we will need the SharePoint Migration Tool (SPMT). We will open the SPMT and alternately enter the details for both the Online and On-premises environments.
Step-by-Step Guide
From the program, select "Add new migration" under the "SharePoint Migration in Progress" section.
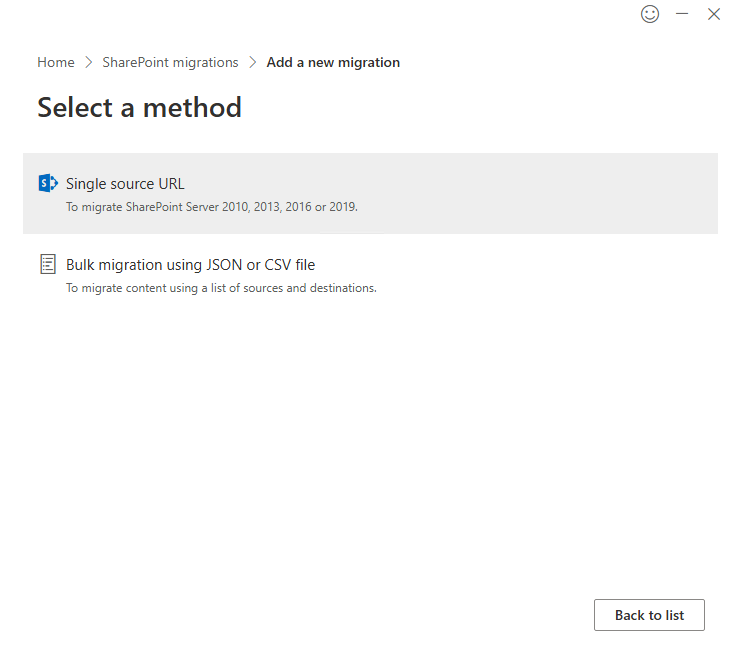
Next, select "Single source URL".
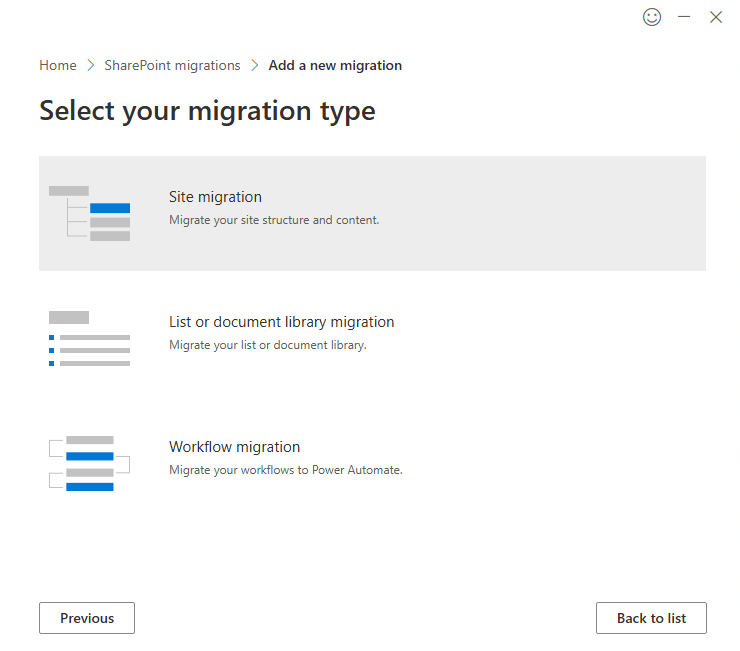
Then, choose "List or document library migration".
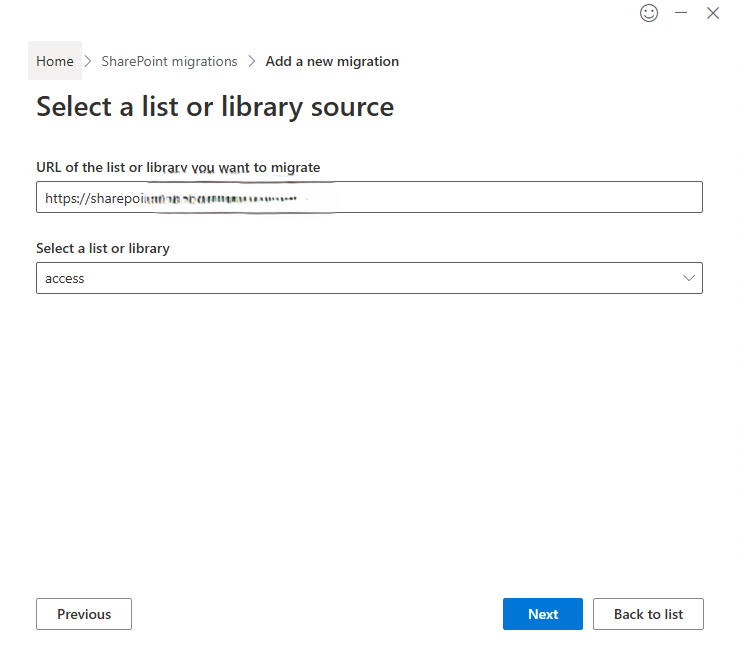
Enter the URL of the on-premises environment hosting the list and resolve the specific list you want to migrate.
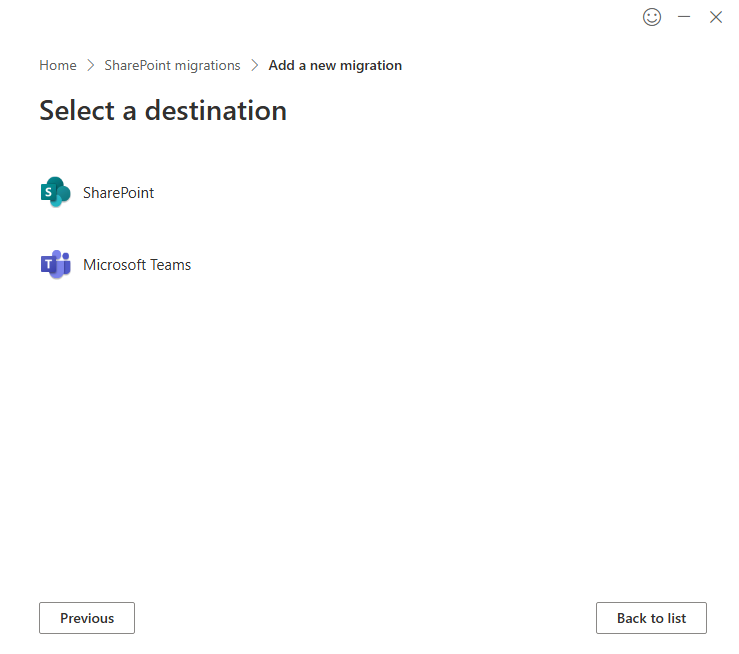
Next, select "SharePoint" as the destination.
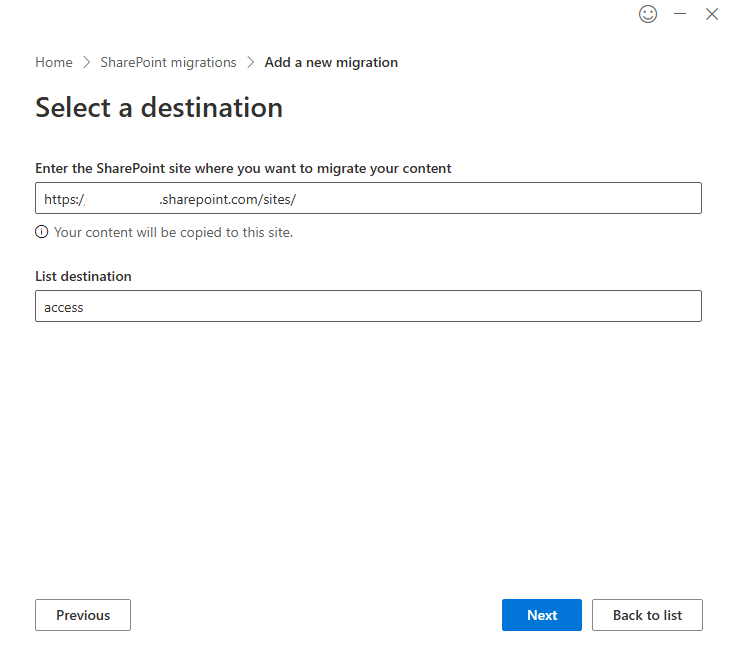
Enter the destination site in the Online environment and the name for the list. By default, it uses the name from the on-premises environment.
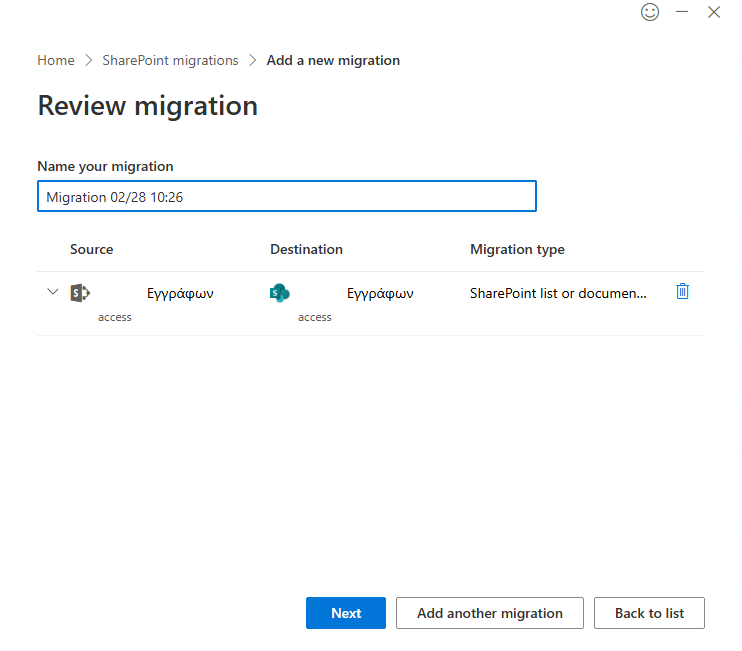
You will then need to provide a name for the Migration link.
Configuration & Settings
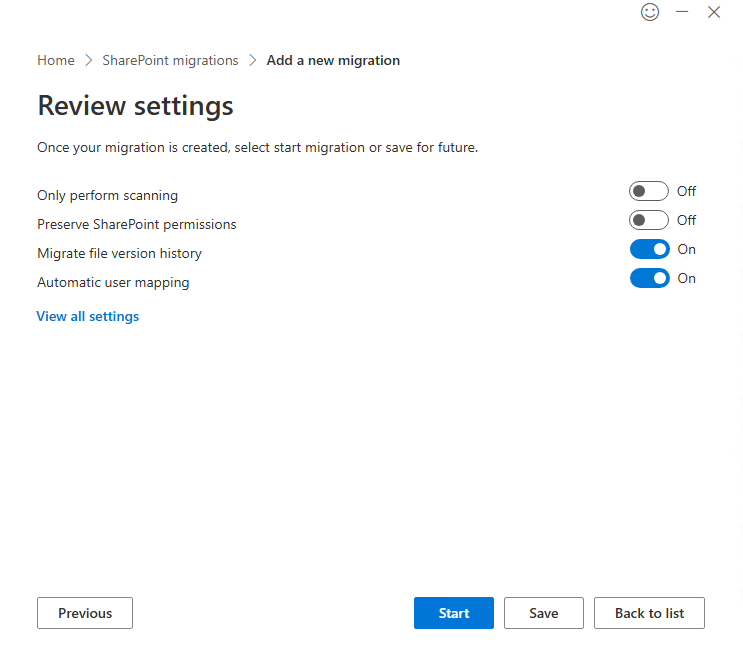
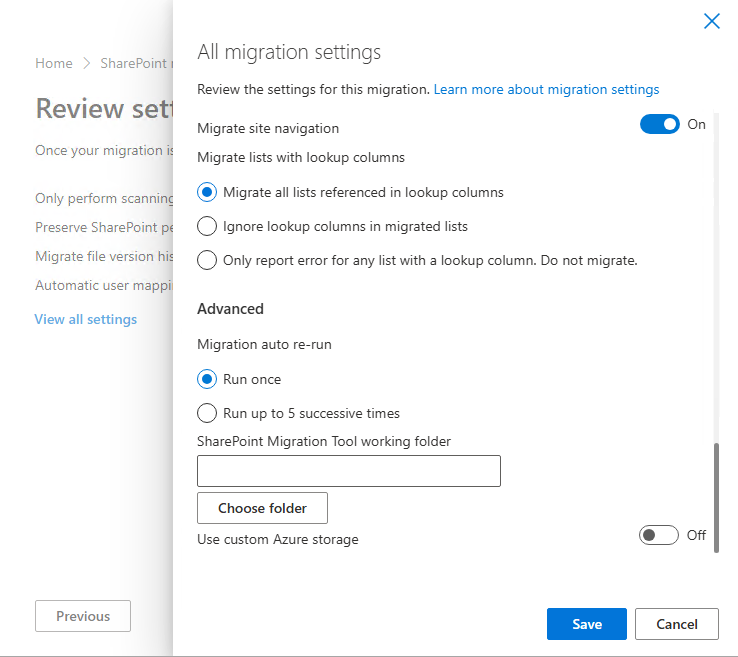
Following this is the "Review Settings" screen, where you can use toggles to choose which settings you want to be active.
For additional configurations, select "View all settings". In this case, you have the ability to enable more advanced options.
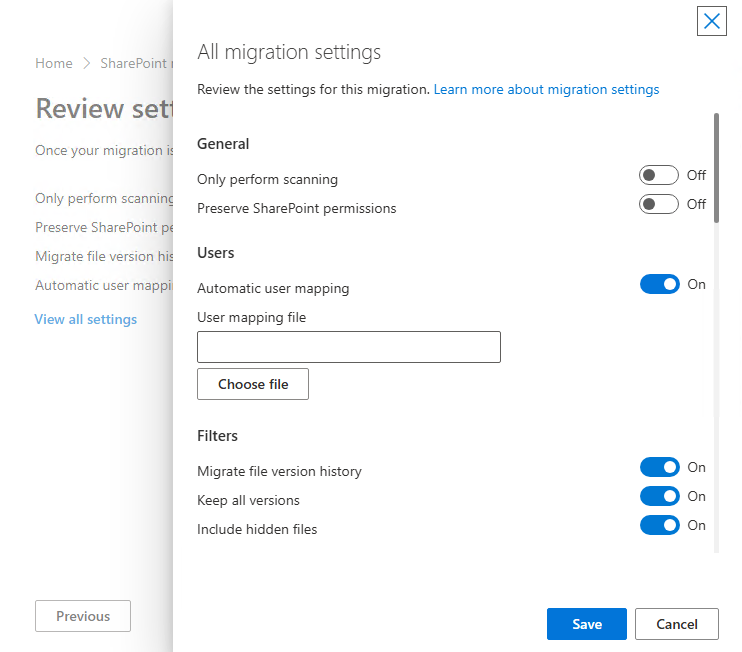
You will see a series of options, such as:
Preserving versioning.
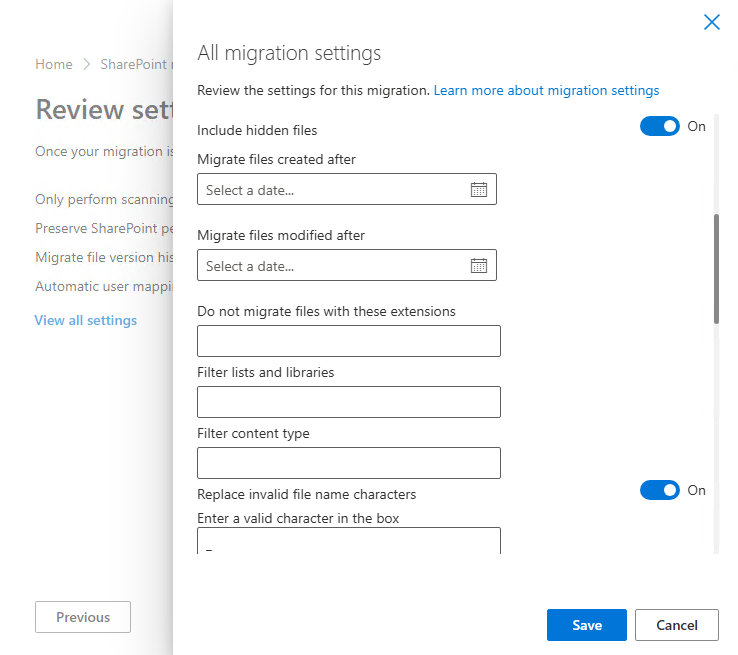
Migrating items from a specific date onwards.
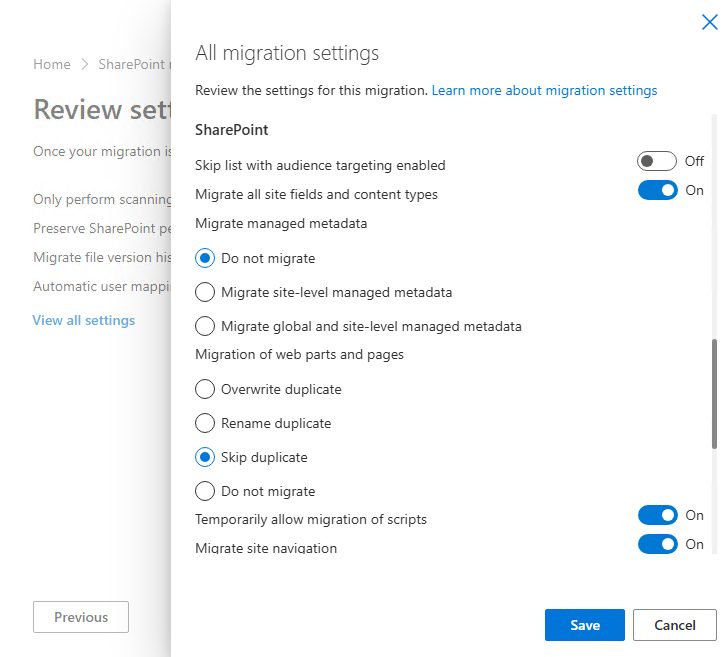
Choosing whether to transfer metadata and content types.
Important Considerations
I should emphasize that you may often encounter various errors during the transfer. This is mainly related to how you have structured your on-premises SharePoint—for example, if you have used custom columns, managed metadata, or implemented custom solutions with 3rd-party tools.