Migrating Folders from SharePoint On-Premise to SharePoint Online
In today’s post, we will look at how to migrate a folder and its contents from a SharePoint On-Premise environment to SharePoint Online. To facilitate this transition, we will need the SharePoint Migration Tool (SPMT).
Step-by-Step Migration Process
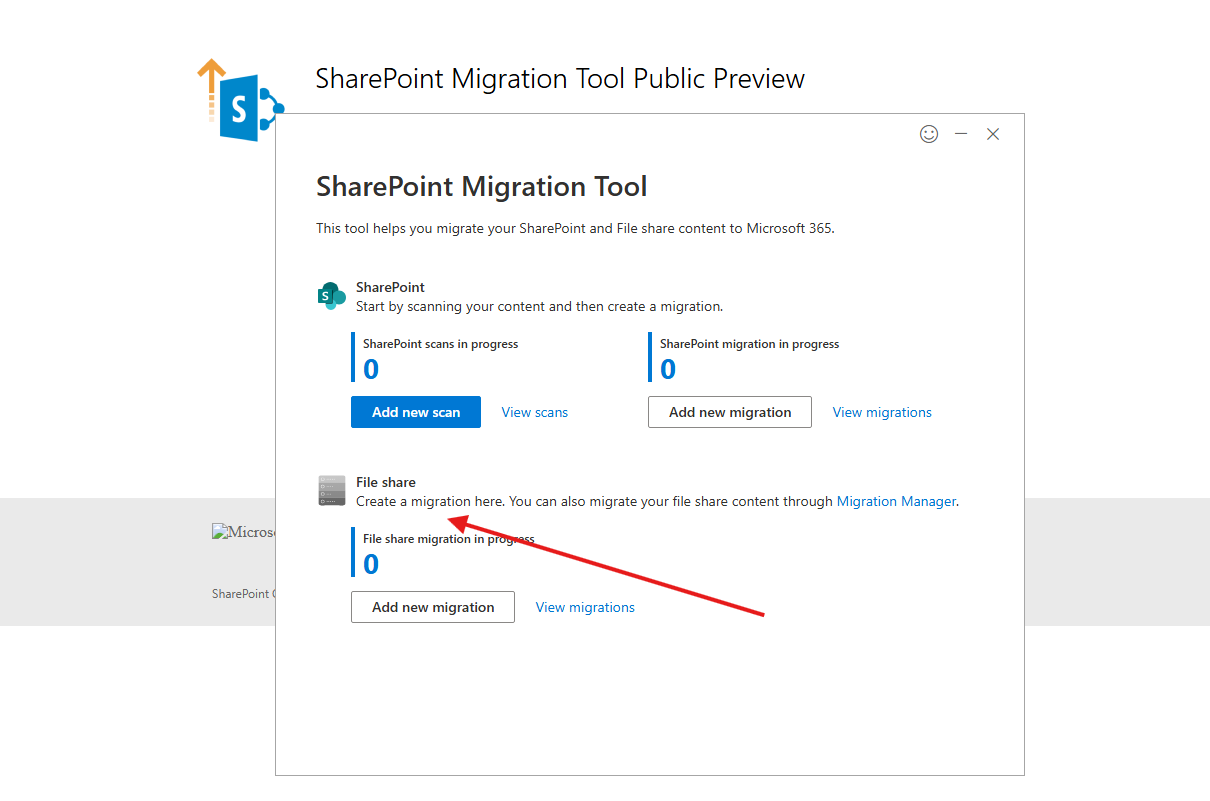
Initialize SPMT: Open the SPMT and sign in with your SharePoint Online credentials.
Start New Migration: Within the application, select Add new migration under the File Share section.
Source Selection: Select Single source URL.
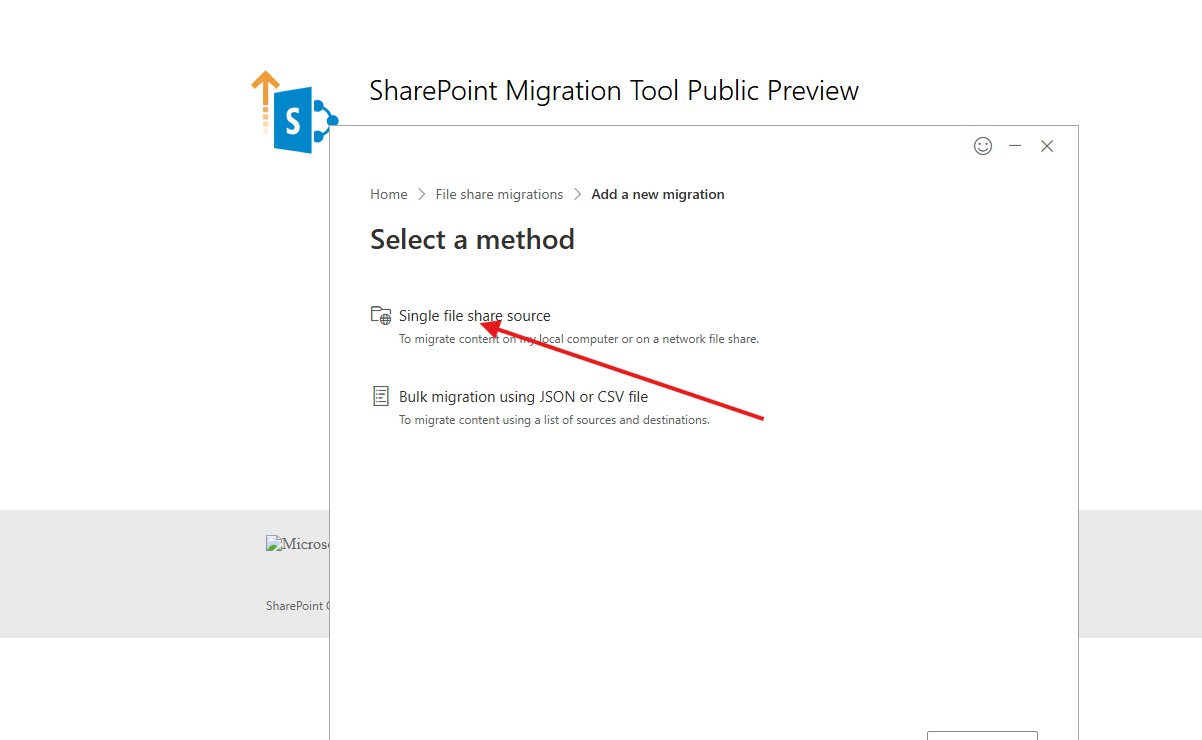
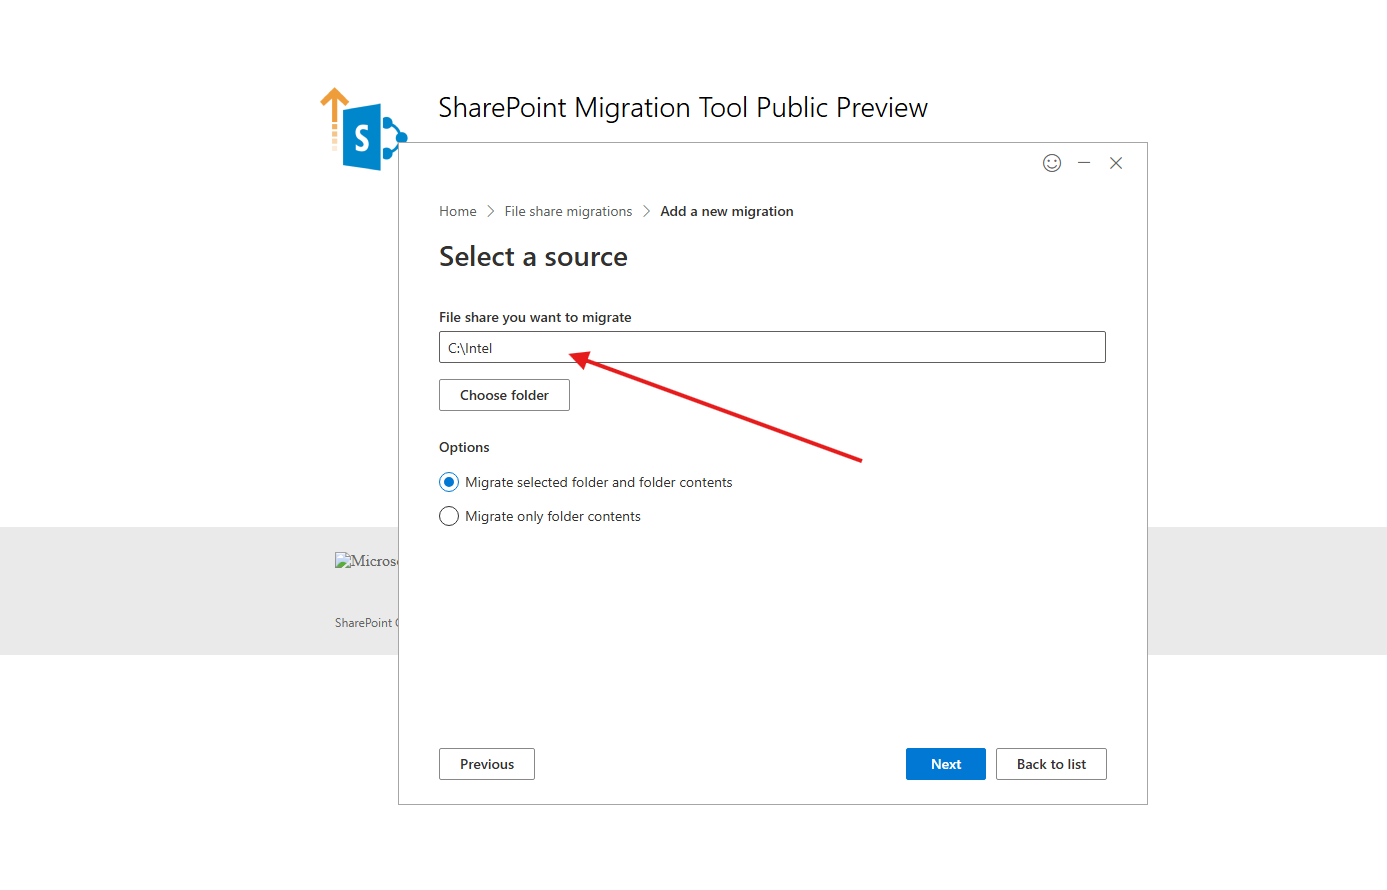
Configure Source: Choose Single file share source. Enter the URL for the folder you wish to migrate. At this stage, you have the option to migrate only the folder contents or both the folder and its contents. Click Next.
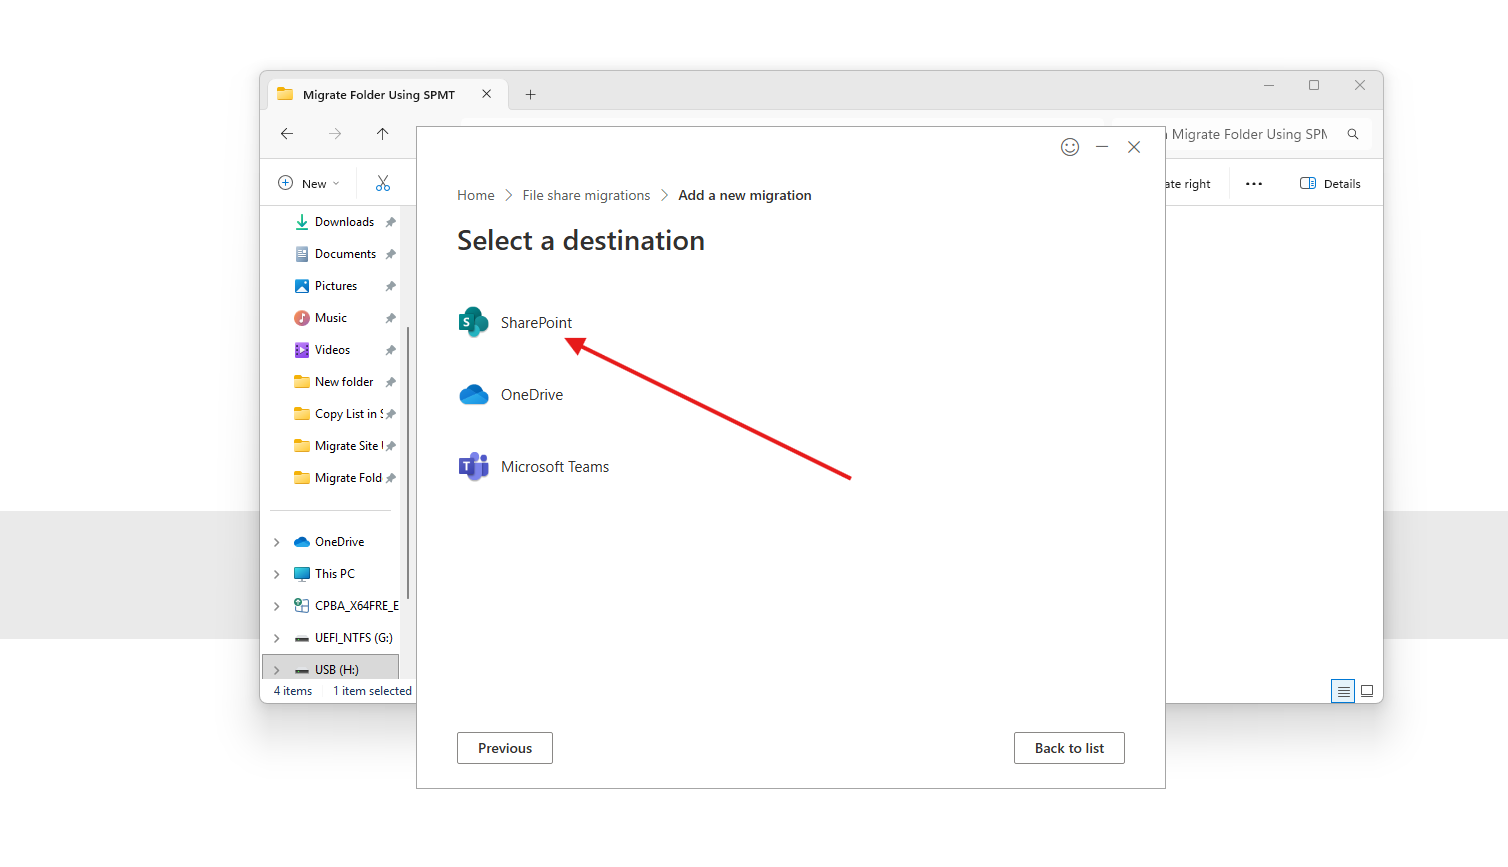
Destination Selection: Select SharePoint as the destination.
Target Site: Enter the URL of the destination site in your SharePoint Online environment.
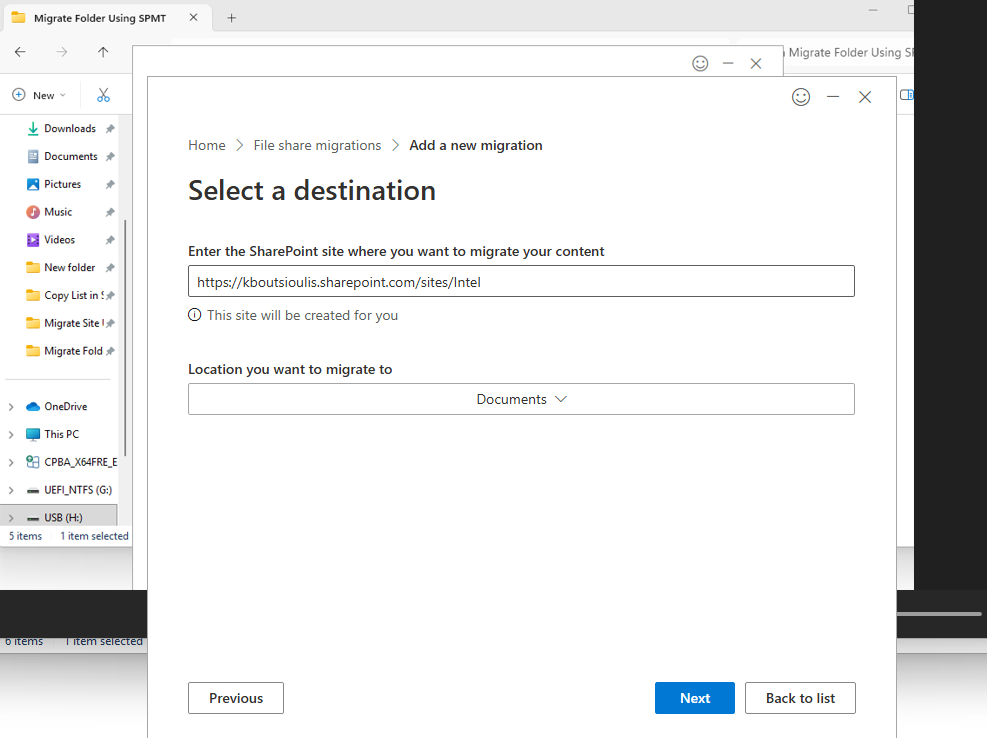
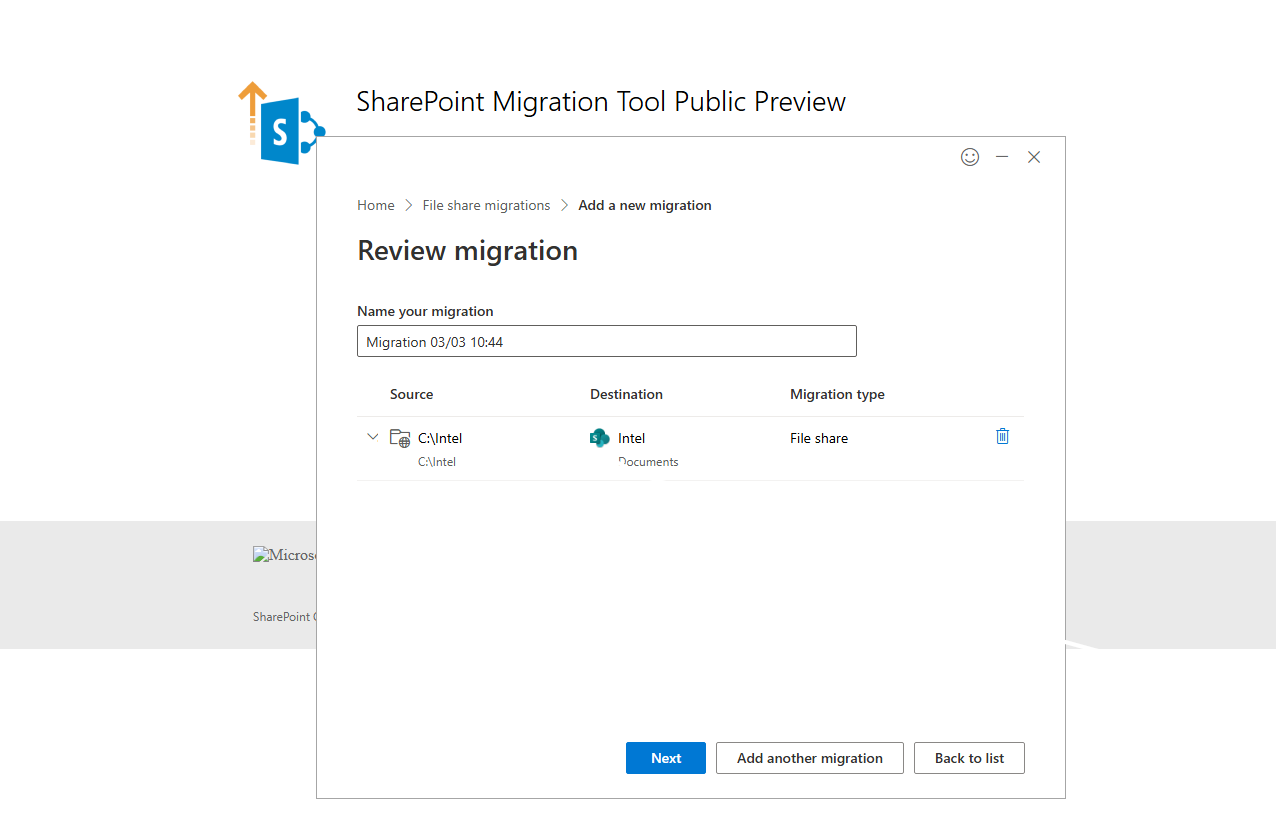
Migration Naming: Provide a name for the Migration link for tracking purposes.
Advanced Settings & Review
Review Settings: The next screen displays the Review Settings page. Use the toggles to enable or disable specific features for your migration.
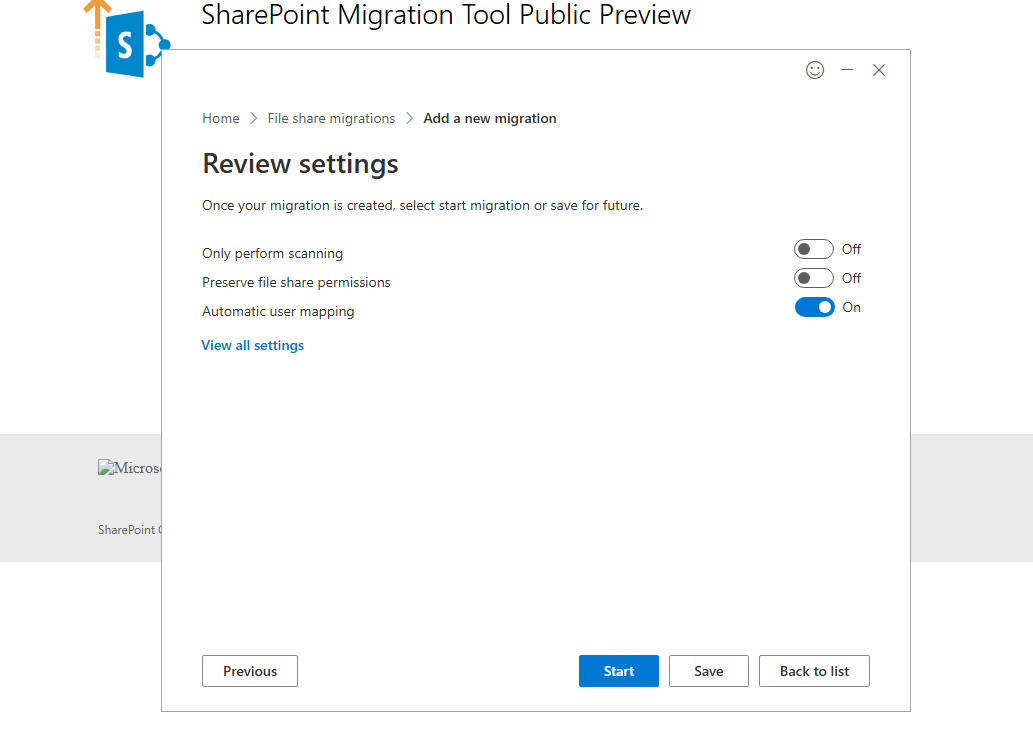
Extended Options: For additional configurations, select View all settings. This provides access to a wider range of advanced options.
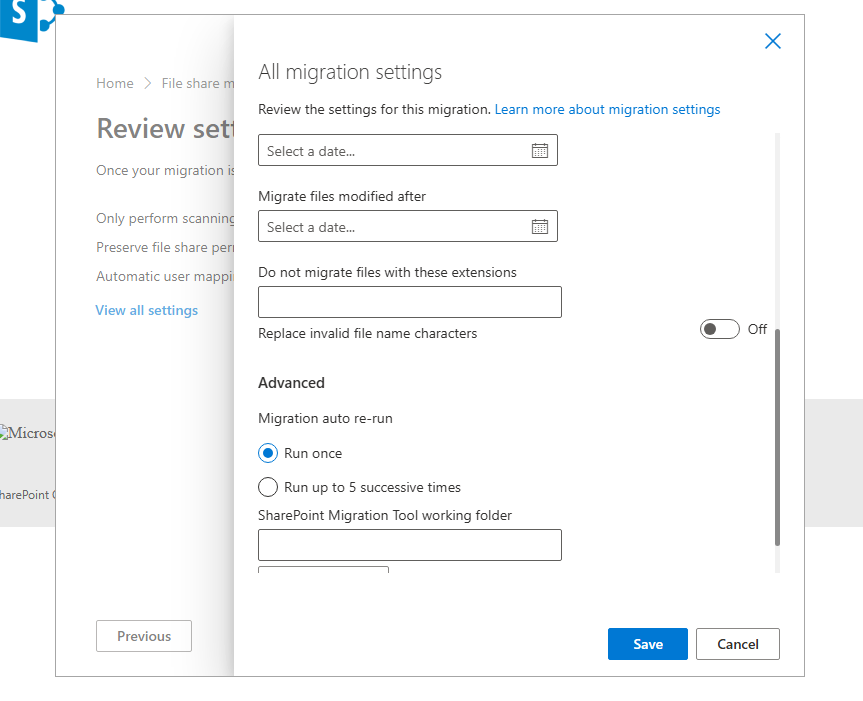
In this section, you can configure several critical parameters:
Versioning: Choose whether to preserve file version history.
Permissions: Maintain user permissions (if users from the On-Prem/NAS environment map correctly to the Online environment).
Date Filtering: Migrate files modified only after a specific date.
Metadata & Content Types: Choose whether to transfer existing metadata and custom content types.
Important Note: You may encounter various errors during the transfer. These are often related to how the On-Premise environment or NAS is structured—for example, if you are using custom columns, managed metadata, or third-party custom solutions.