In today’s post I will show you how we can apply a template from an existing SharePoint site to a new site.
First, we need to create a SharePoint list through which we will generate a new site.
We name this list Site Creation.
In this list we must have at least the following columns: Title, URL Segment, Site Description, Site Type, Site Owner.
Then we go to the main page of Power Automate.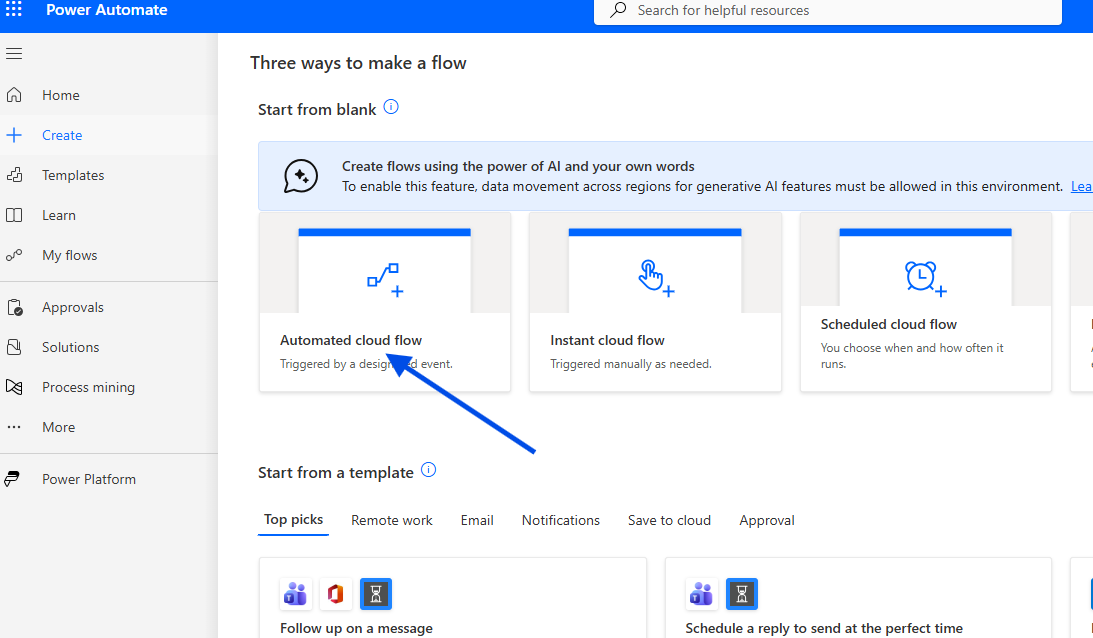
We select a new Automated Cloud Flow.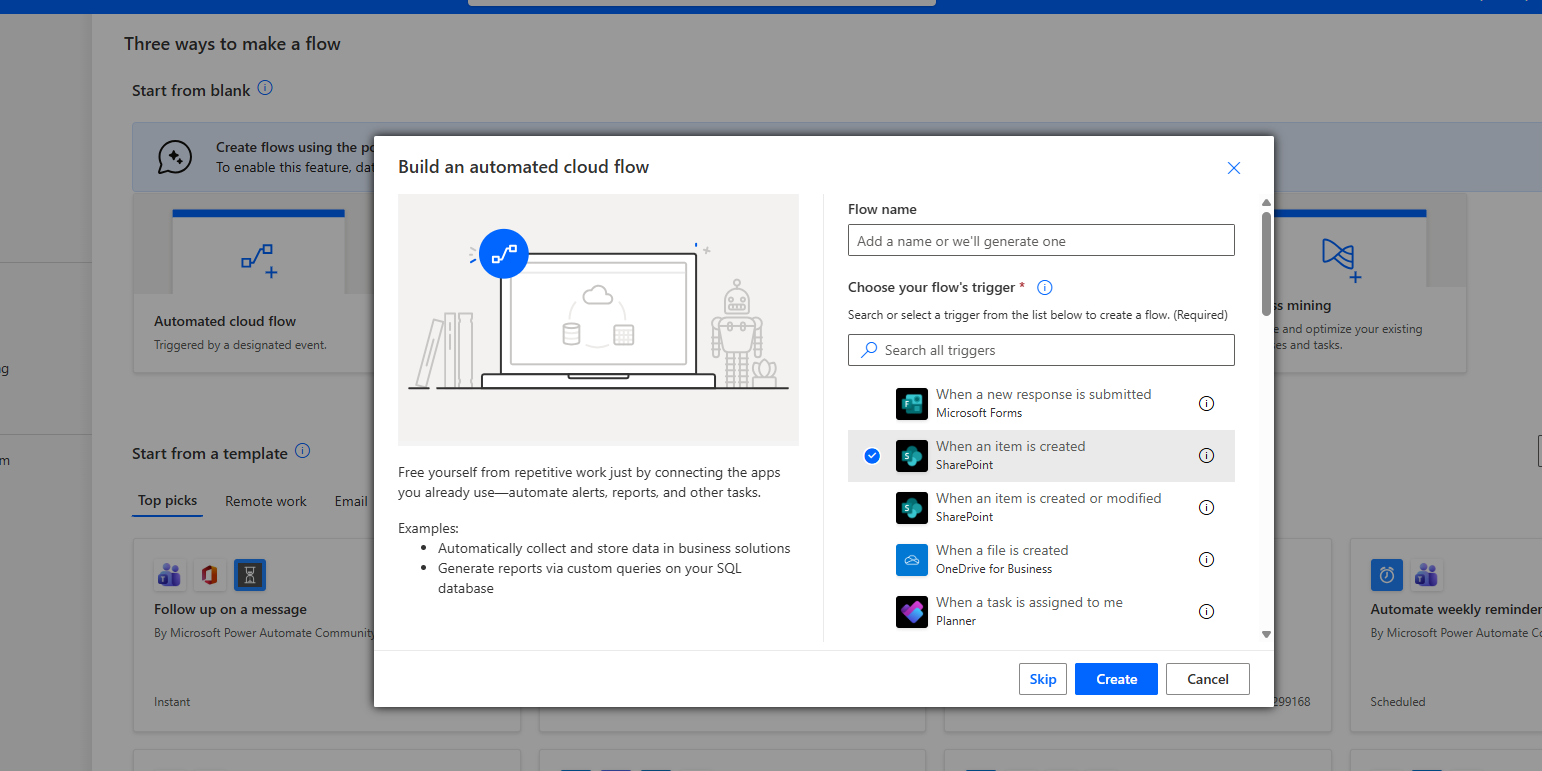
Next, we enter a name for the automation and choose When an item is created as the trigger.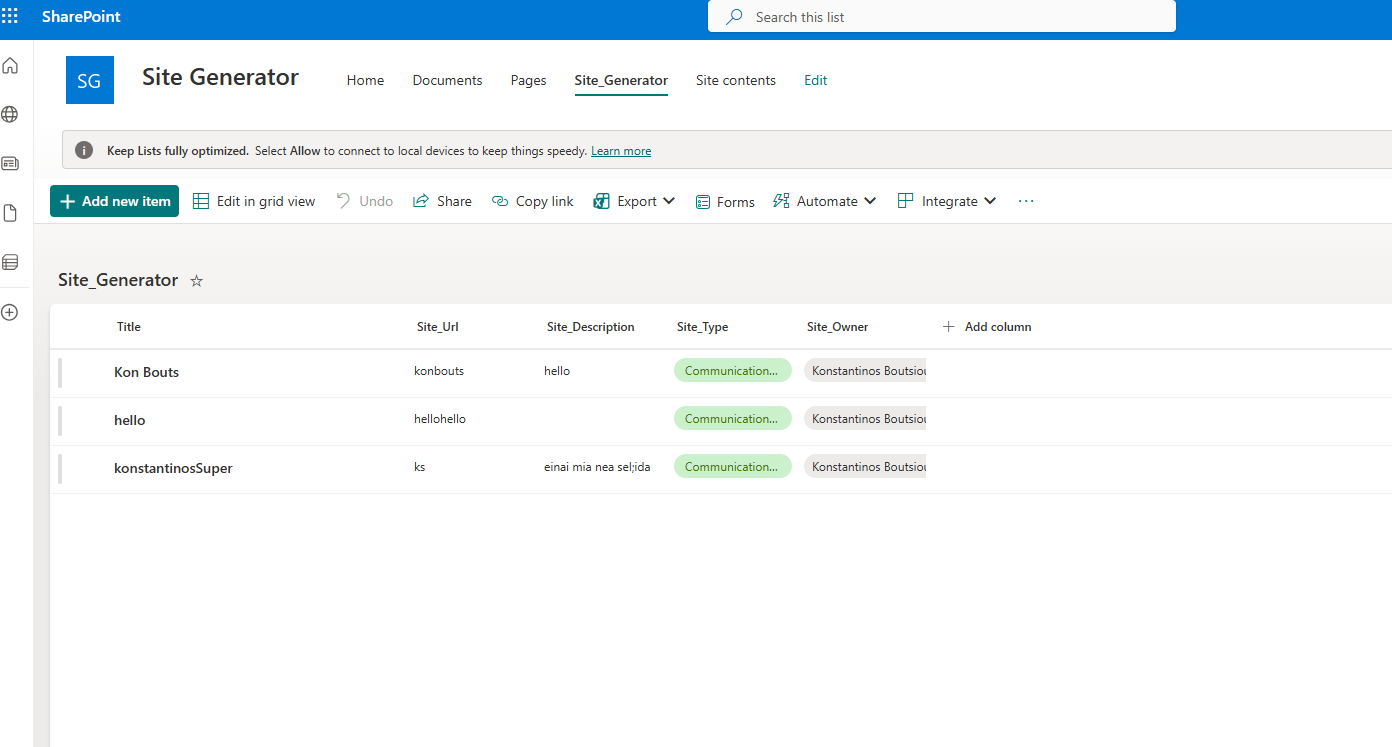
Once inside the automation, in the first action we select the site that contains the Site Creation list, and then select our list.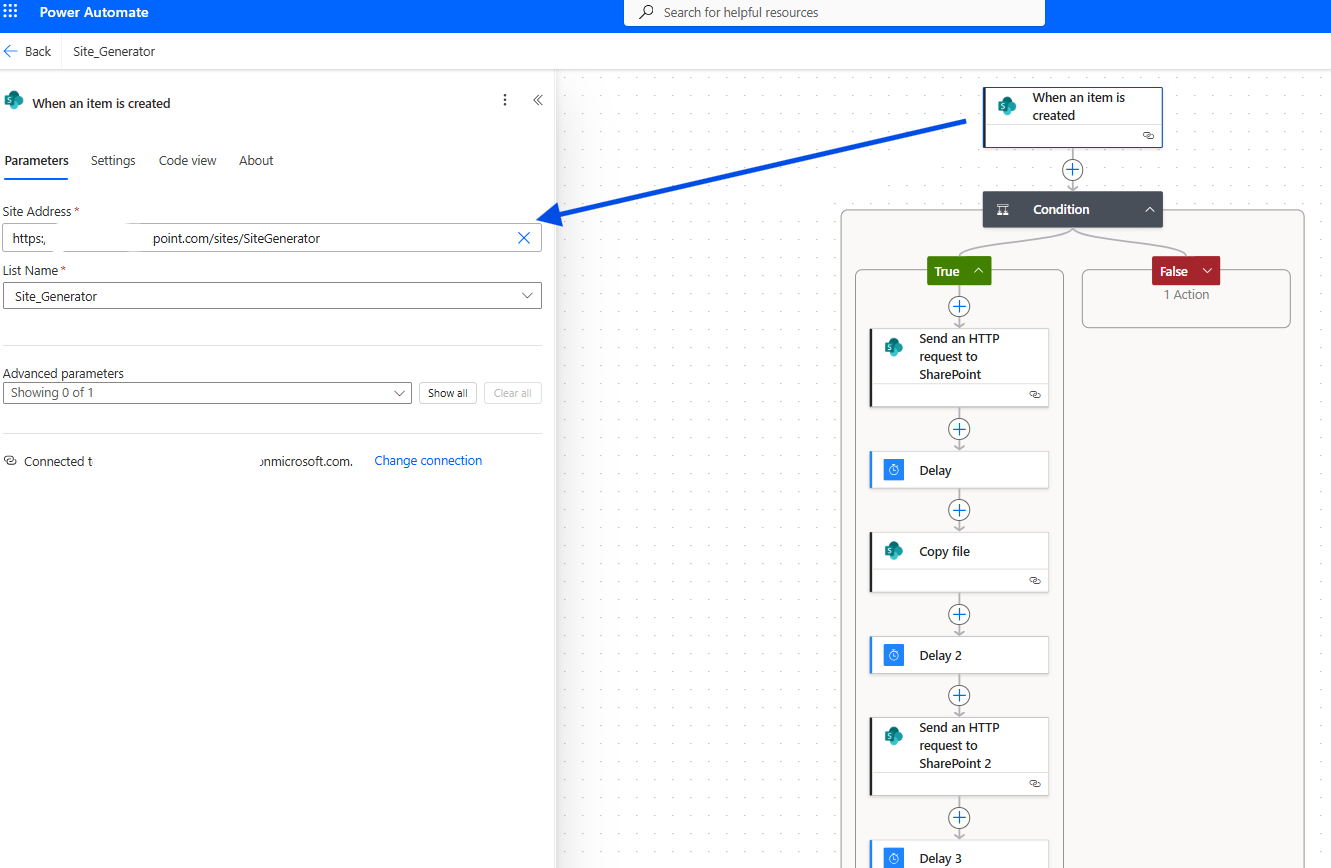
In the flow, we add a Condition because we will have different site type options, such as Team Site, Communication Site, etc.
The condition is: if Site_Type is equal to Communication Site.
The same process will need to be repeated for each site type.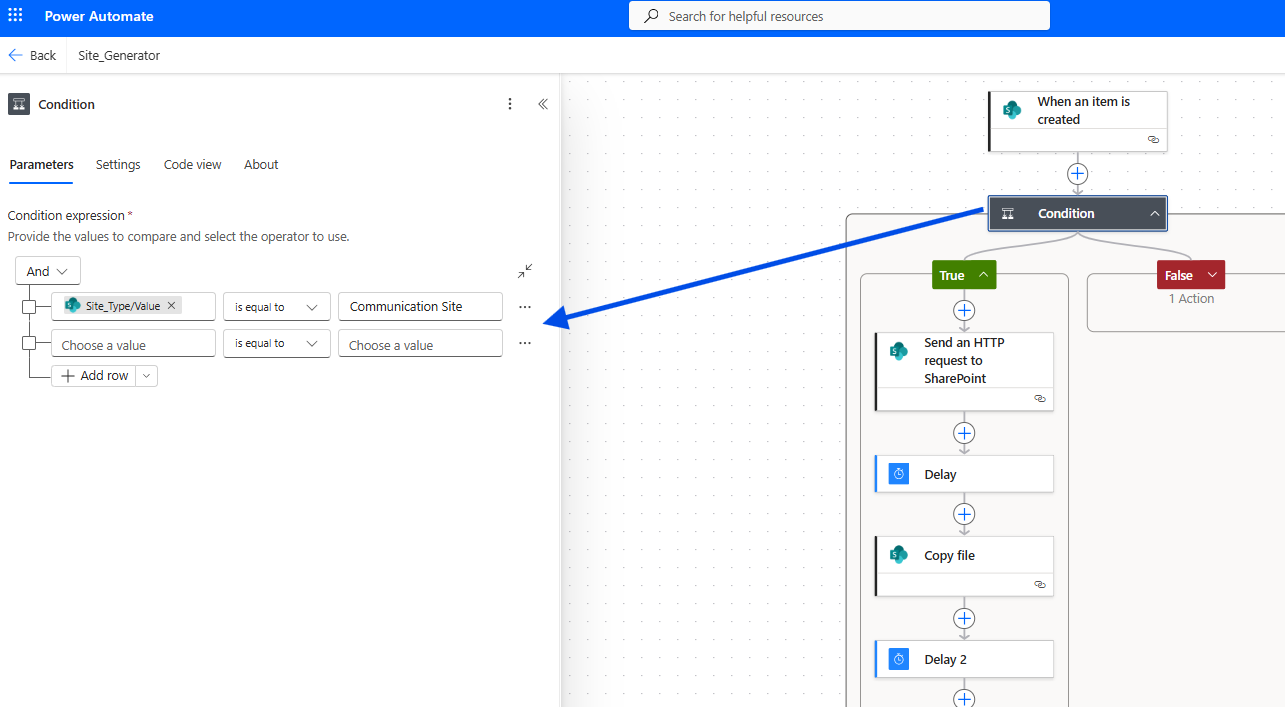
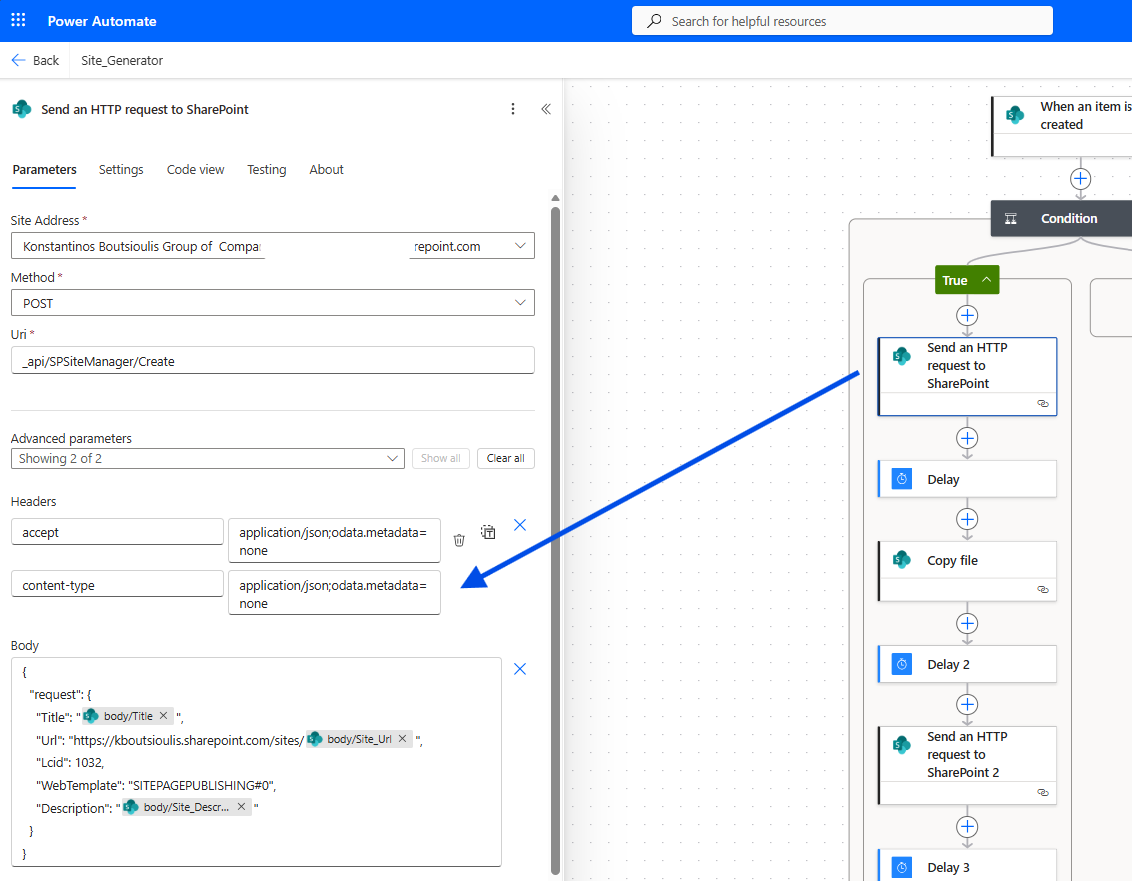
In the next step, we choose an action of type Send an HTTP request to SharePoint, select the site, and enter the following settings:
Method: POST
Uri: _api/SPSiteManager/Create
Headers:
- Accept:
application/json;odata.metadata=none - Content-Type:
application/json;odata.metadata=none
Body:
{"request": {"Title": "@{triggerOutputs()?['body/Title']}","Url": "https://MYTENANT.sharepoint.com/sites/@{triggerOutputs()?['body/Site_Url']}","Lcid": 1032,"WebTemplate": "SITEPAGEPUBLISHING#0","Description": "@{triggerOutputs()?['body/Site_Description']}"}}
Next, we add a Delay action for one minute to allow time for the site creation process to finish.
The following action is a Copy file, because this is how we will copy home.aspx from the template site so that we can keep the custom layout we created.
We select the current template site as the source and dynamically set the destination site.
The folder should be Site Pages, and we want to replace the Home.aspx file.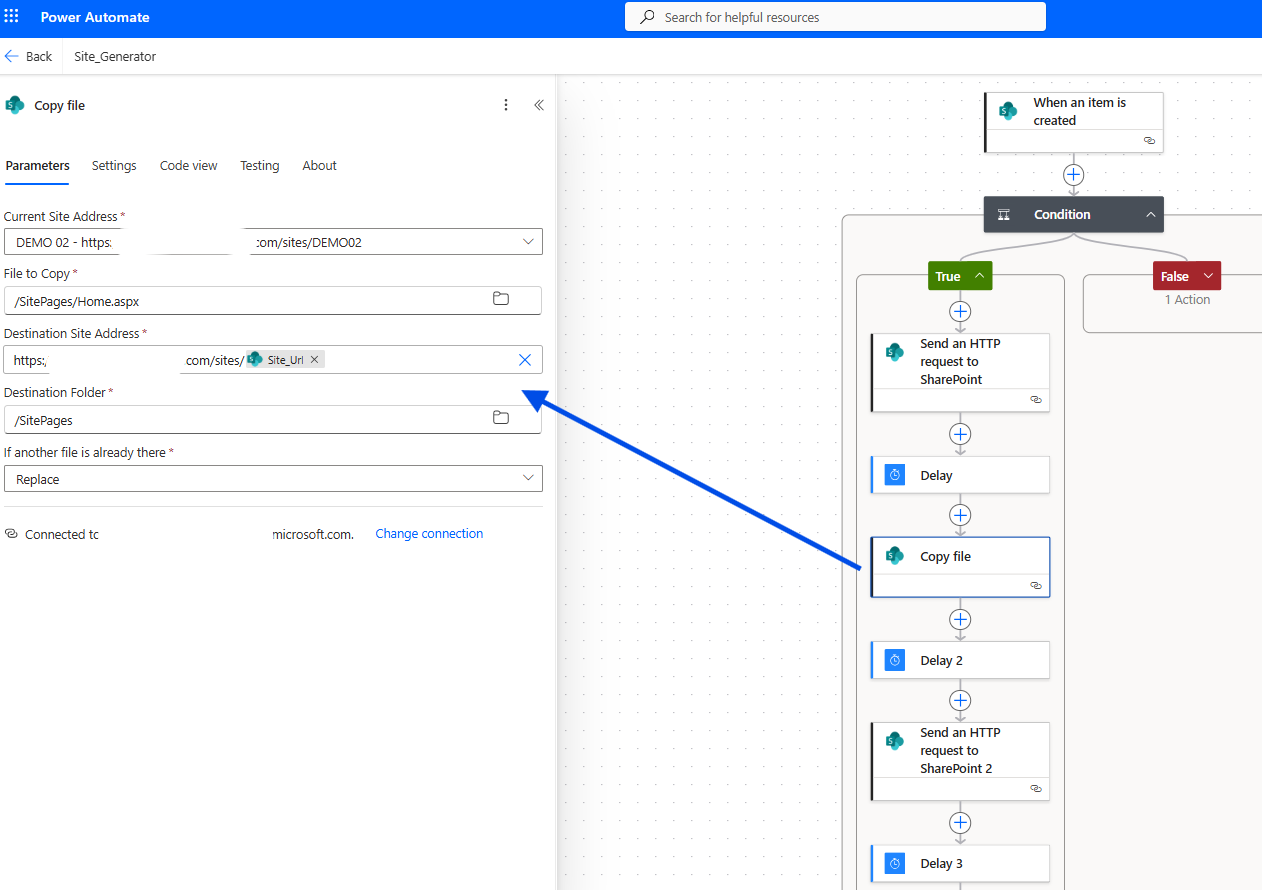
Then we add another 1-minute delay to ensure the process is completed.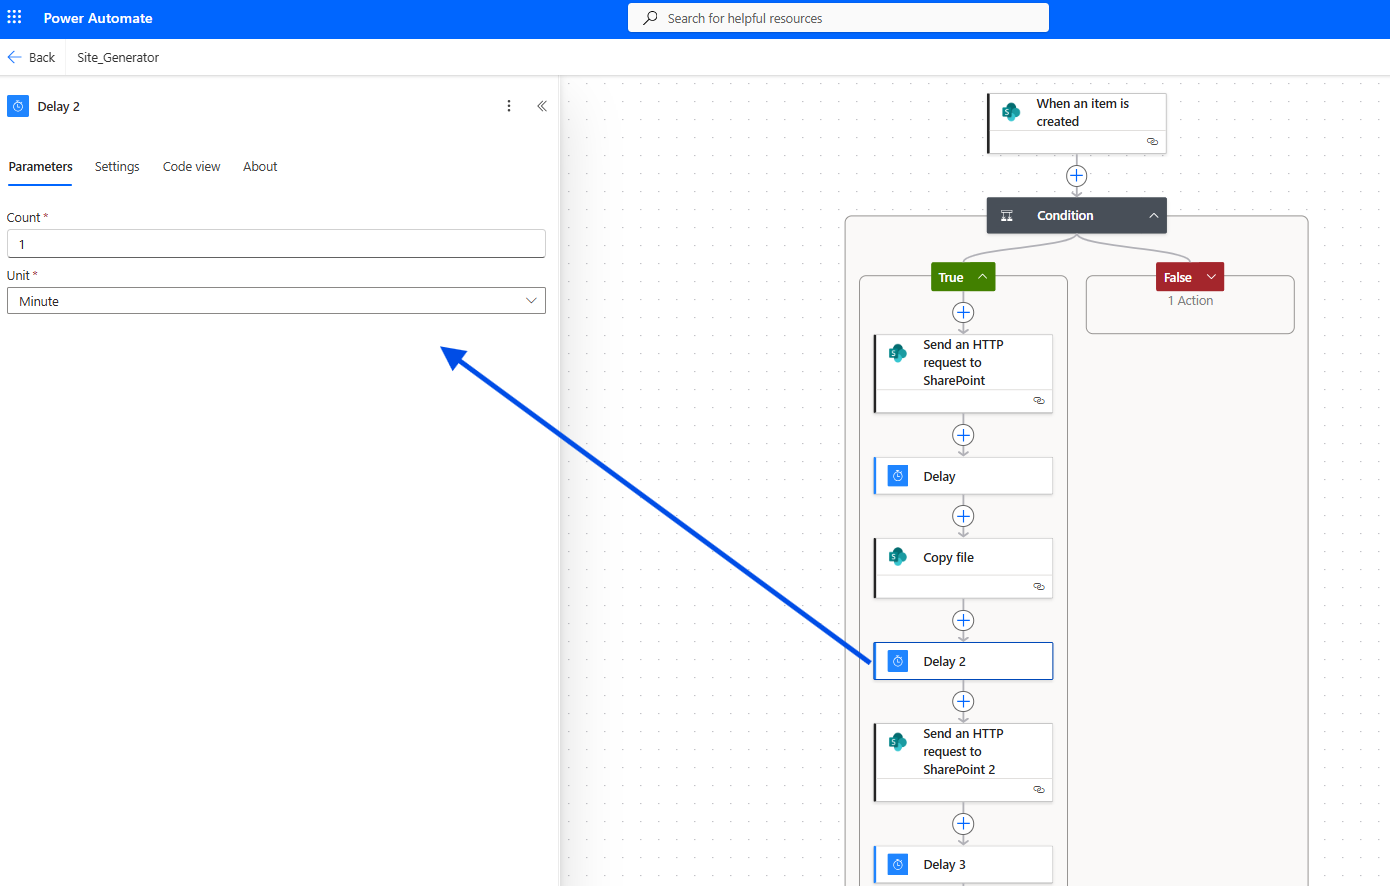
The next action is again Send an HTTP request to SharePoint, this time to copy a list that we want replicated exactly as it exists in the template site.
Here we must set the site URL and then the following details:
Method: POST
Uri:_api/Microsoft.SharePoint.Utilities.WebTemplateExtensions.SiteScriptUtility.GetSiteScriptFromList
Body:
{"listUrl": "https://mytenant.sharepoint.com/sites/Demo02/Lists/Cal1"}

Then we save the automation.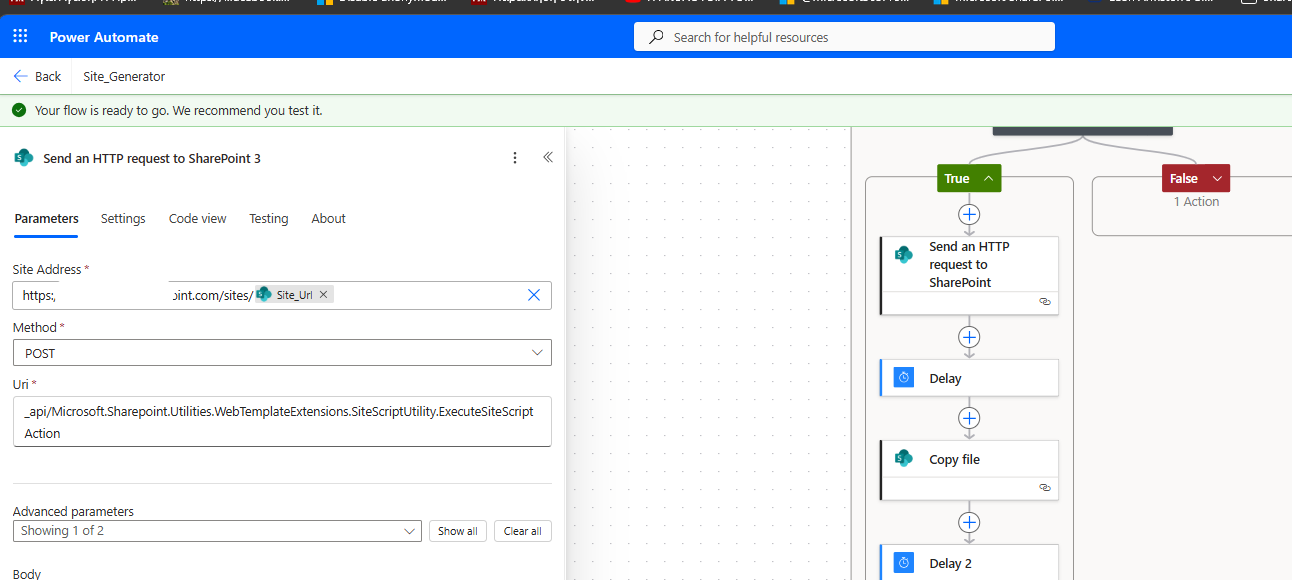
In the next step, we perform a manual test.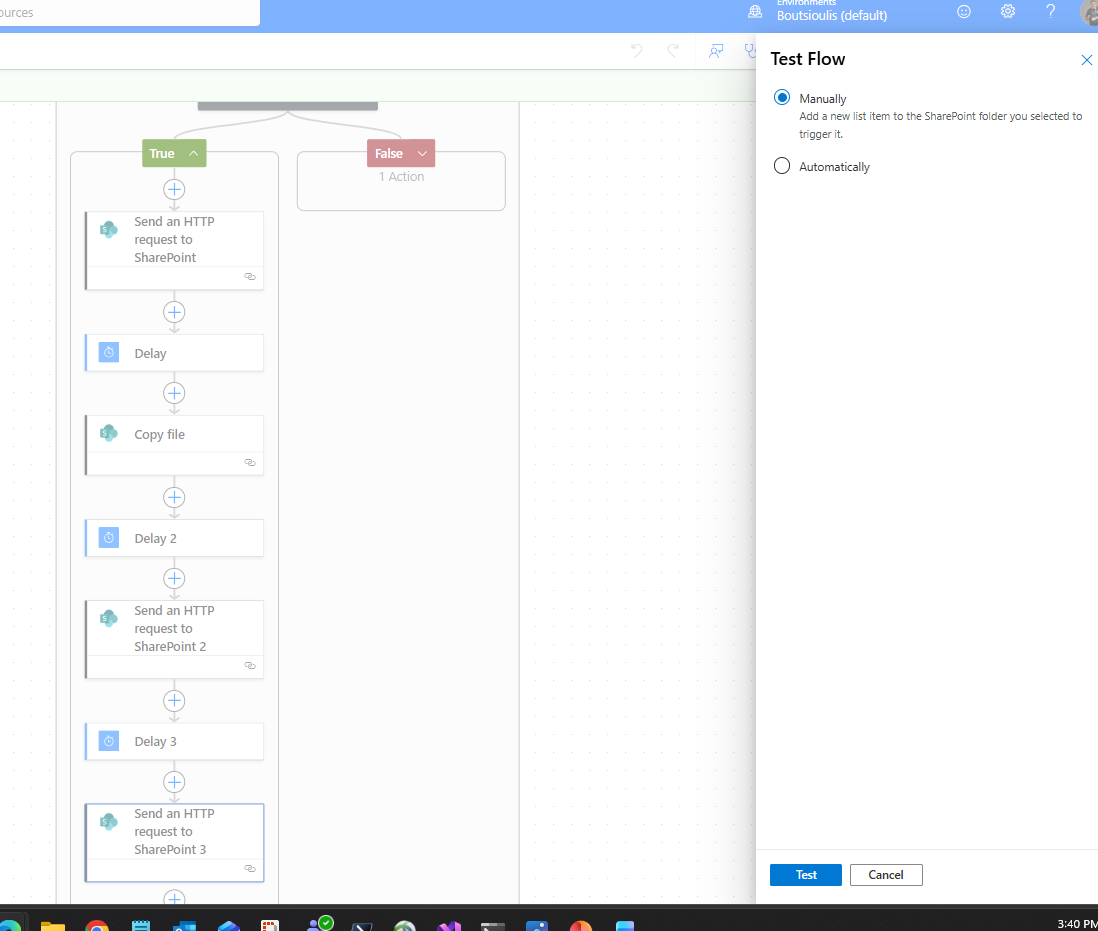
We create a new item in our list, filling all required fields, and indeed the automation runs without any issues.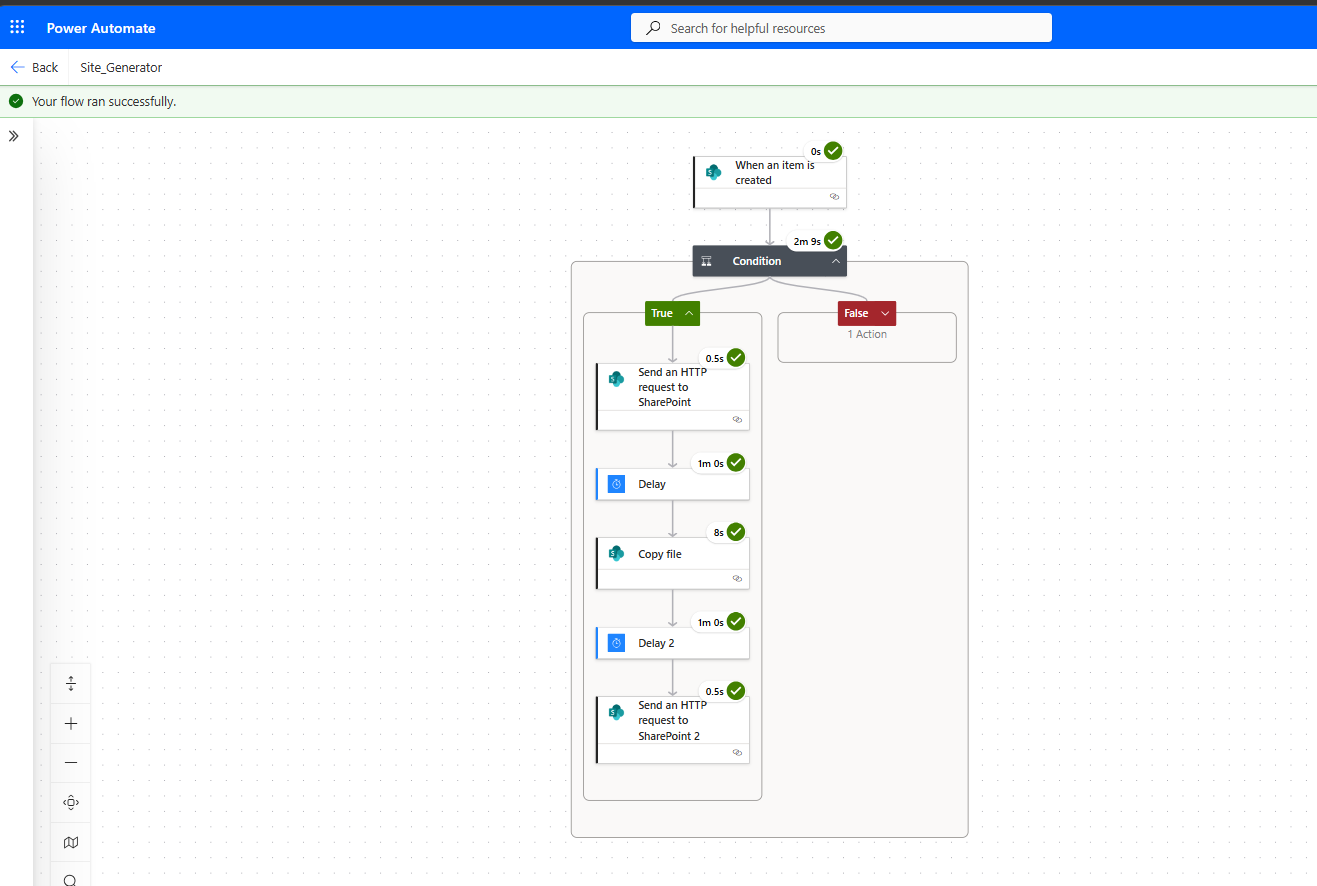
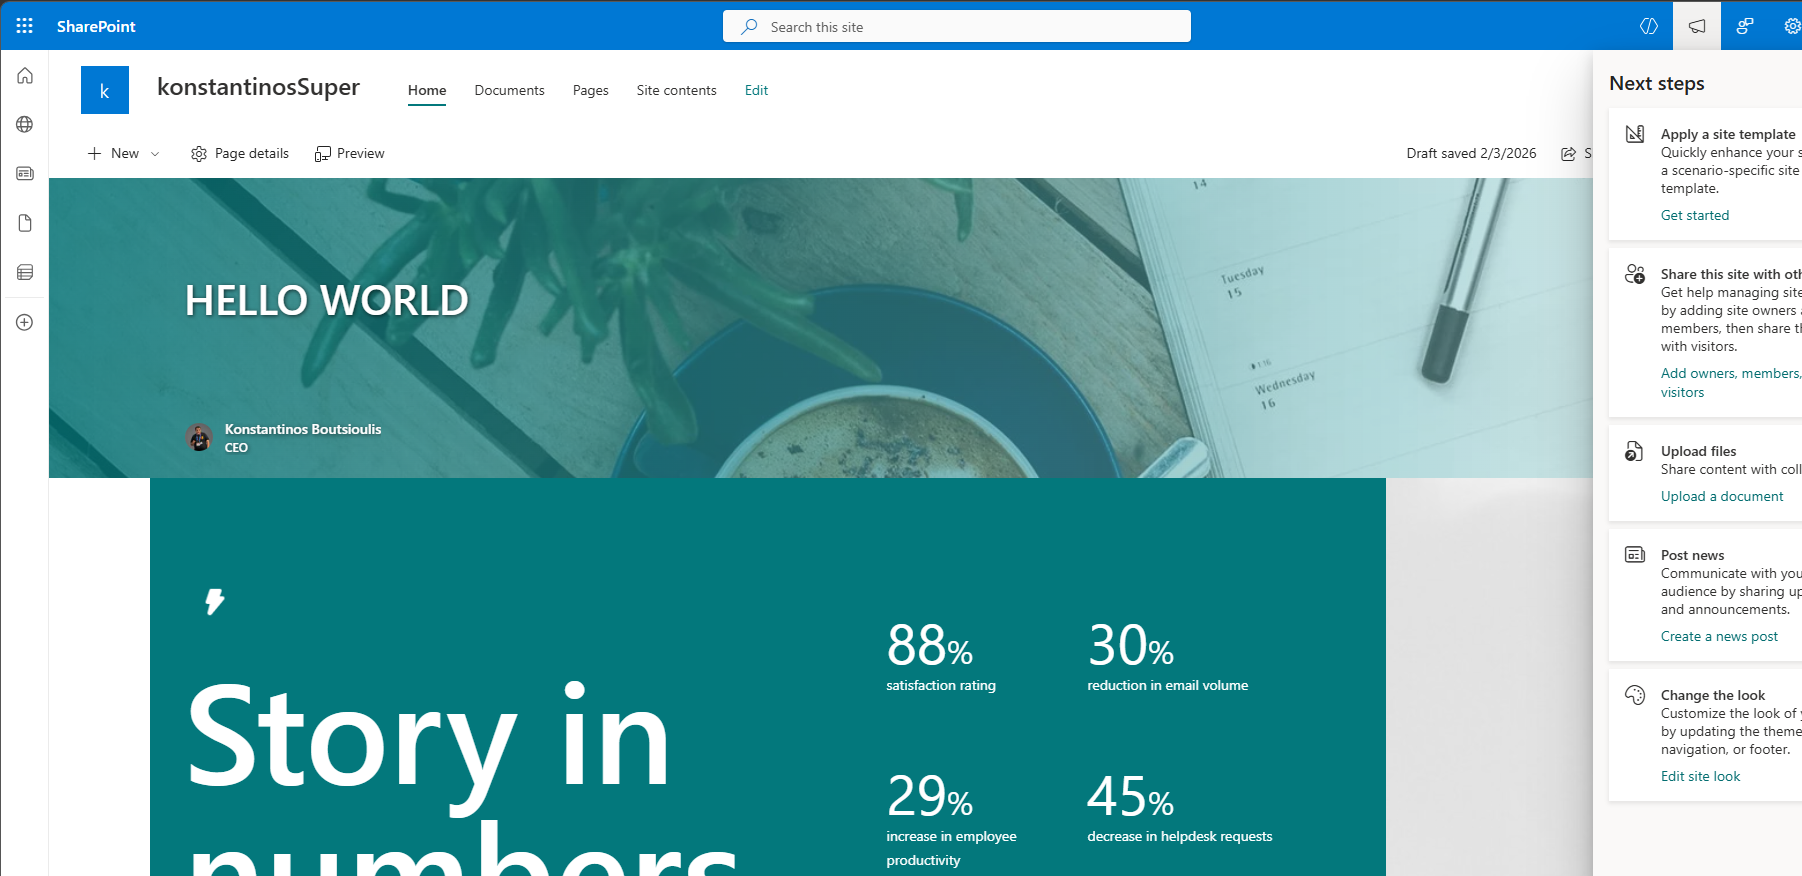
Finally, as you can see, the site has been successfully created and the template with its lists has been copied properly.