In today’s post we will see how we can enable IRM for a library in SharePoint.
First, we need to navigate to the page that hosts the library and from the gear icon at the top right select Site contents.
Next, we select the library where we want to apply IRM.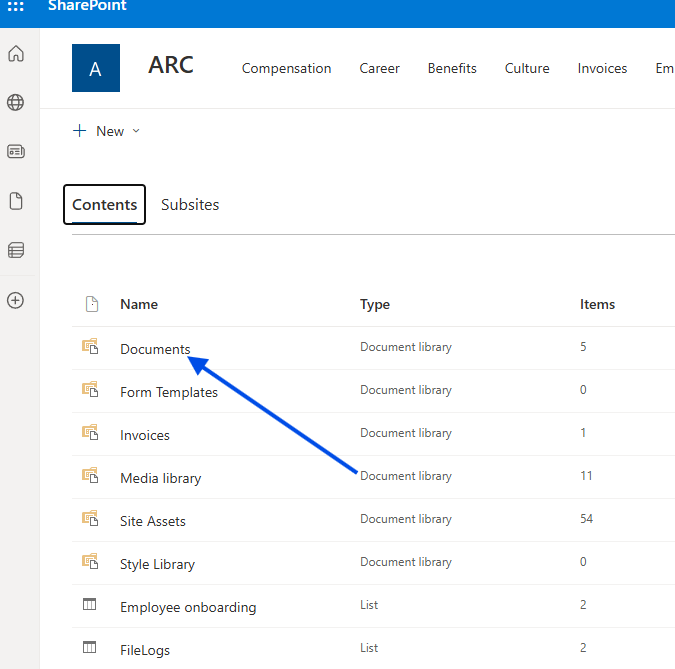
In the next step, we again select the gear icon at the top right and then choose Library settings.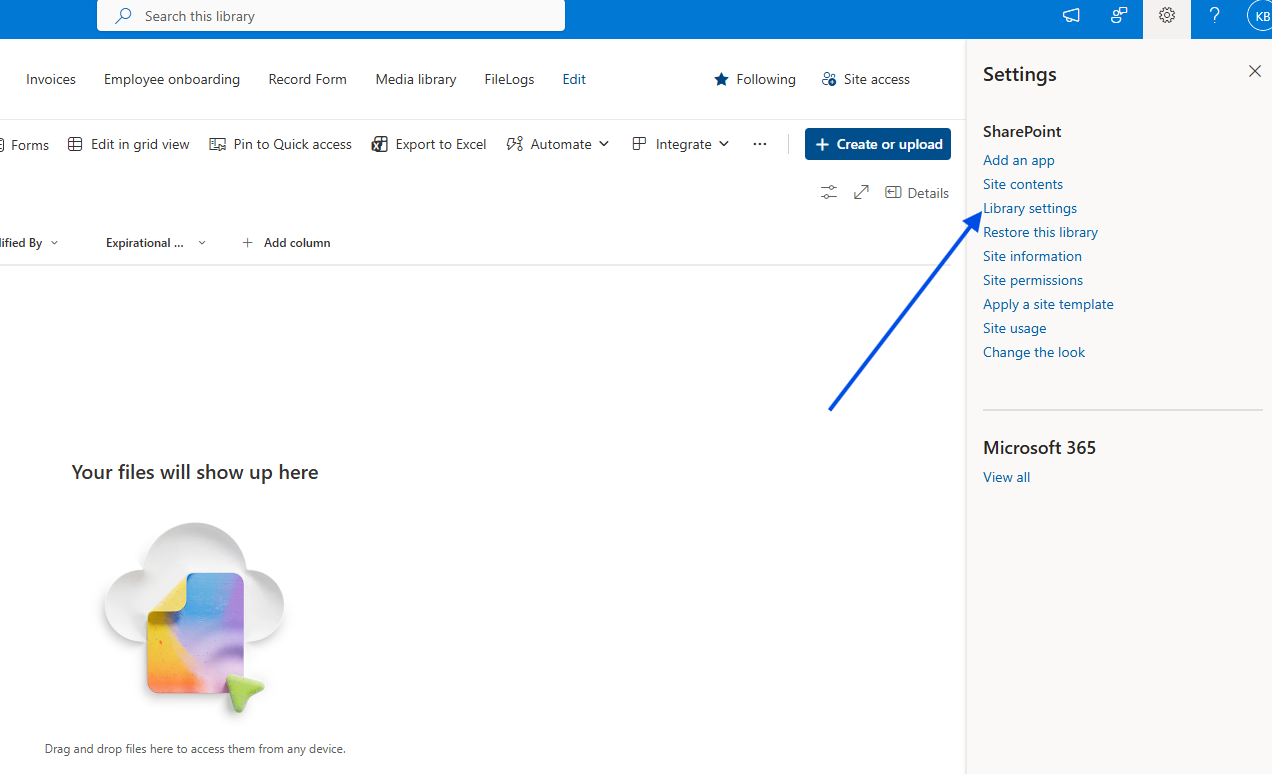
In the following step, we select More library settings.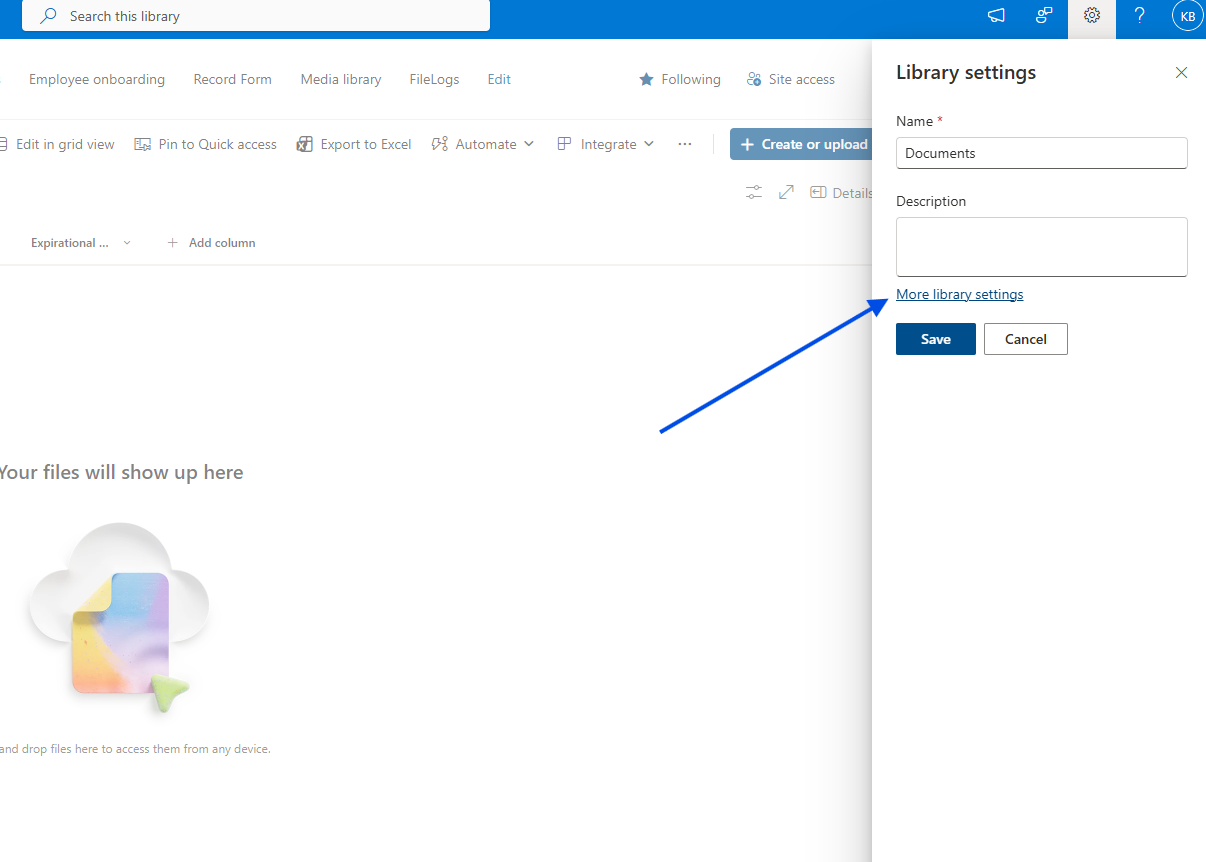
Inside the library settings, we select Information Rights Management.
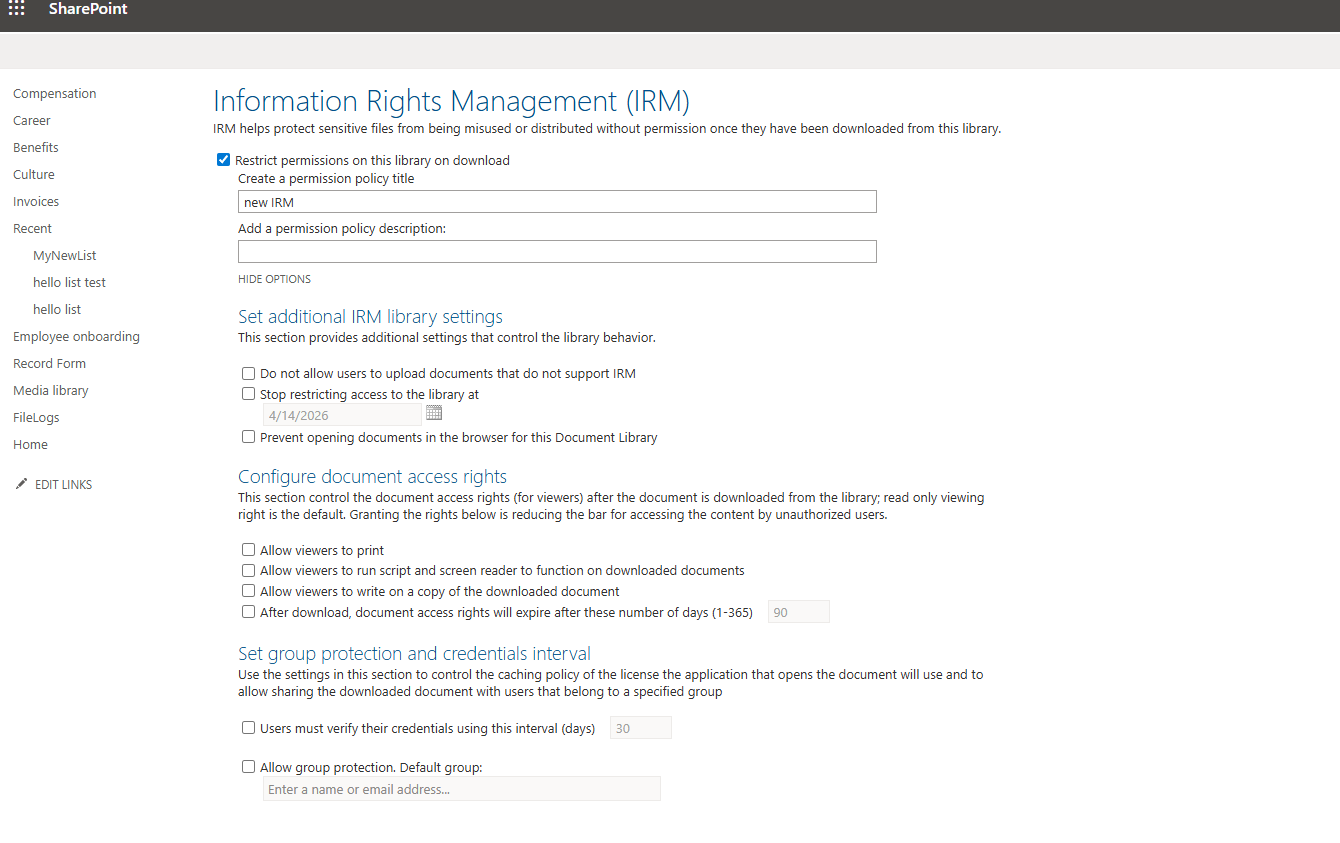
We add a new name for our IRM configuration and then select Show Options.
Below, as you can see, we have a series of options, such as whether we allow users to print documents, download documents, etc.
Set additional IRM library settings
This section provides additional settings that control the library behavior.
Do not allow users to upload documents that do not support IRM
Stop restricting access to the library at
Prevent opening documents in the browser for this Document Library
Configure document access rights
This section control the document access rights (for viewers) after the document is downloaded from the library; read only viewing right is the default. Granting the rights below is reducing the bar for accessing the content by unauthorized users.
Allow viewers to print
Allow viewers to run script and screen reader to function on downloaded documents
Allow viewers to write on a copy of the downloaded document
After download, document access rights will expire after these number of days (1-365)
Set group protection and credentials interval
Use the settings in this section to control the caching policy of the license the application that opens the document will use and to allow sharing the downloaded document with users that belong to a specified group
Users must verify their credentials using this interval (days)
Allow group protection. Default group:
In detail, we have the following options.
We select or unselect depending on how strict we want our policy to be.